Jewelry casting at home for beginners
But how are we going to fuse paraffin onto a ring when it is incredibly fluid and unpredictable? It turned out that everything is much simpler. In the process, the master realized that paraffin remains plastic for a long time and can be deformed like plasticine. And so it happened. He simply molded the desired ring shape and continued. True, it wouldn’t hurt to go through a soldering iron in order to fuse the molded boundaries. But the master decided not to do this. Later on the castings this will appear as a defect, but not so bad that you can’t wear this ring. Now we need to process the molded model. The master decided to do it with sandpaper, but he doesn’t remember whether it was forty or sixty, but it was definitely very rough. And again for good reason. The fact is that a large grain of sandpaper leaves a deep mark on the paraffin and gives it texture. Therefore, carefully walking along the front part of the ring with coarse sandpaper, we will leave the resulting texture for casting. Since the paraffin could fail at any moment, the master decided to leave the finishing work to the brass casting.
As a flask (a metal mandrel for pouring the molding mixture), you can take a very ordinary metal pipe; for example, a plumbing store should have pieces of a suitable size.
We will make the sprues from 2 nails. We bite off the excess with pliers and install them in our plasticine sphere. After installing them, we somehow need to attach the wax model to the metal sprues. To do this, the author decided to take a burner and slightly heat the nails, and then lean the ring against them. Hot nails will easily melt the paraffin and go deep into the model.
This is bad and wrong, but still possible. The main thing here is to provide gentle heating at first, so that the water from the plaster begins to evaporate, and the paraffin begins to smoothly melt and flow out. The master used a roofing torch for this, since he had one. You can get by with a household burner, or you can start with a very ordinary oven, it will be more correct. Just don’t forget to place the mold with the sprues down in some kind of tray so that there is somewhere for the paraffin to drain.
You can pour metal at home in several ways: using potatoes, clay, or any other dense, moisture-containing material. But the author has never mastered this method, so he will cast metal using a manual centrifuge.
It looks like a glass with four bolts (for more reliable fixation of the flask), a chain and a handle made of PVC pipe with bearings inside (for long-term unhindered torsion).
The author welded this thing himself, but you can get by with, for example, a metal mug.
We heat the mold until red and prepare to pour the brass. As a starting material, you can take brass plumbing fittings. They're great for this. Well, or if you are braver, you can immediately pour silver or even gold. There are no restrictions on metal in knee technologies.
Now we need to process the ring. The author did not take a drill, but cleaned everything up with files and sandpaper. Everything is real, but the only difference is the time and labor intensity of the classes.
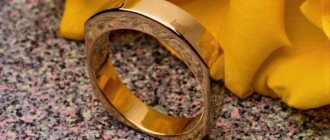
After rough processing, the author decided to try on the ring, but it turned out that it did not quite fit.
After finishing sanding the ring, you can blacken its front part in order to give visual depth to our relief left by the coarse grain of sandpaper. For this we need pharmaceutical sulfur ointment. We apply a thin layer to the brass surface that we want to blacken and heat the ring. We heat until all the ointment burns out and a dry matte surface remains.
After blackening, we polish the ring again, but with finishing abrasives and admire the result.
As mentioned at the beginning, the ring shed perfectly. All the defects that you can notice were obtained at the modeling stage. Therefore, in an amicable way, it is better to use more processed materials. After all, the better the model is prepared, the less you will have to work with it after casting.
Thank you for attention. See you again!
Source
How to become a jeweler
—What did you dream of becoming as a child?
- Firefighters. I thought that this was a courageous profession and that everyone respected firefighters. But then I found out that they were getting pennies, and I changed my mind. I was involved in sports - powerlifting, so after school I decided to enroll in the Faculty of Physical Education. But he didn’t become a physical education teacher either: a jeweler he knew suggested going to him as an apprentice, his father supported him and said: “Go, you’ll always earn money for food.”
I was hooked on this profession as soon as I saw the metal melting - it was very beautiful!
For a whole year, every day after classes at the university, I went to the workshop, studied, and then began to carry out simple orders. A year later, my teacher went on vacation, leaving all the work to me. I was very worried: it was scary to work without support, I was afraid of messing up. But I did it, and also earned money.
— Do you remember your first completely independent job?
- Yes, I still keep it. This is a pair of silver wedding rings. They are terrible (laughs): there are visible seams on the rings, they are uneven, and not polished properly.
— As for “earning money for food”: does a jeweler always have work?
- Yes. Firstly, in store-bought jewelry, something often tears, bends, breaks, and people go to jewelers for repairs. Secondly, in the workshop you have the opportunity to make jewelry that no one else will have. According to any sketch, any shape and size.
Pendants in the shape of boxing gloves were made as a gift for world boxing champion Alexander Besputin, who trained in Tula last summer.
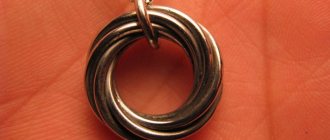
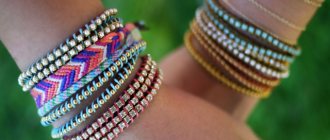
Again, handmade: even two identical rings will never be the same. I once had an order from Israel: a girl asked for ordinary congo earrings (rings). There are plenty of them in stores, but she wanted handmade ones.
Weave bracelet "Pharaoh" and lock "Box". The jeweler says that this was his most difficult job in a year.
— What talents and qualities are needed to work as a jeweler?
– You need to have perseverance, hard work and communication skills. The ability to communicate is very important - you work not only with metals and stones, but primarily with people. As for talent, today you don’t have to be an artist to work in the jewelry industry: in our age, most products are made using a 3D computer model.
Making your own silver wire
The master class is dedicated to the production of silver wire. The process is quite simple if you have the necessary tools. Silver wire is a very necessary and sought-after material in the process of creating jewelry.
Tools needed to make silver wire:
Materials and chemicals required for the manufacture of wire: 925 silver alloy in the form of granules, borax, flux, bleach.
To make wire, I use ready-made 925 silver alloy in the form of granules.
First, I pour silver into the crucible and heat it until red, then add a pinch of borax to protect the alloy from oxidation (it creates a film that protects it from the surrounding air).
Melt the silver by stirring with a titanium rod until the silver is able to flow.
We pour the metal into a mold, which is periodically heated, i.e. it should not be cold before you start pouring liquid silver into it. If the mold is cold, the metal will harden instantly upon contact with the cold mold, and you will not get a bar of the desired shape. There are several sizes of molds on the mold; you need to choose the size at which the resulting bar will not exceed the size of the roller gap.
The next step is to roll the silver block through the rollers, gradually reducing the gap. The rollers have strands of different cross-sectional sizes through which the bar is rolled from a larger cross-sectional area to a smaller one, depending on the desired wire diameter. In this master class I made wire with a diameter of 0.8 mm. When moving to a smaller stream size, it is advisable to anneal the bar with a gas burner (before annealing, it is necessary to moisten the bar with flux to avoid oxidation), because During the rolling process, under the influence of pressure, the mechanical properties of the alloy (hardness, ductility.) change as a consequence of changes in the crystal structure of the alloy. During annealing, the crystalline structure of the alloy is restored and the mechanical properties change in the direction of increasing ductility and decreasing the hardness of the alloy. After each annealing, it is necessary to soak the rolled bar in bleach to remove flux residues, and also to remove all kinds of solid particles.
Before drawing, you need to make sure that the rolled wire is free of contamination and flux residues; to remove the flux, you need to dip the wire in the bleach. We sharpen the end of the wire with a file.
Lubricate the slightly heated wire with natural beeswax to reduce friction. The die board has labeled holes of various diameters. We fix the spinneret board in a vice, insert the pointed end of the wire into a hole of the appropriate diameter and pull it out using pliers.
We stretch the wire to the desired diameter, moving from larger to smaller hole, and do not forget to periodically anneal the wire and lubricate it with beeswax. The finished wire can be used to create jewelry.
Separately, I would like to describe the process of wire annealing. Since the wire is thin, individual turns of the wire may melt during annealing. Before annealing, the thin wire must be wound so that the turns are adjacent to each other as tightly as possible. This is necessary to avoid melting.
It is advisable to make wire yourself only in cases where you use it quite a lot and constantly or have the opportunity to sell it, because... wire making tools are not cheap.
Thank you for paying attention and reading my master class, I hope you find it useful.
Source
Jeweler's Tools
A modern jeweler is literally a jack of all trades. To perform a full-fledged job, he must possess a wide range of skills and tools. It is impossible to describe the entire arsenal of specialized tools in one article, but it is quite possible to outline the minimum set of what a novice jeweler needs to work. It includes the following categories of tools and equipment.
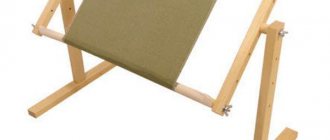
Carpentry tools. They are used to create and process metal blanks for future jewelry. The required set includes the following carpentry tools:
Optics. In most cases, a jeweler deals with small-sized items, so for his work he needs magnifying optical instruments, among which are:
Office tools. Before making the jewelry itself, the jeweler creates sketches and sketches of it, which are also useful for coordinating the project with the customer. For this purpose, ordinary office tools are used:
Grinding tools. This equipment is used by jewelers to give products smoothness and shine. For this purpose, the following tools are used:
Software. In addition to tools for directly creating jewelry, jewelers widely use computer modeling tools and creating sketches of future products. The following software packages are used for this:
Obviously, the above list of tools and programs used by jewelers is far from complete. In their work, they use a huge range of other equipment for cutting stones, casting, 3D printing of models, soldering, etc. Professional teachers at the J-DESIGN.PRO school of jewelry design can introduce you to all the basic aspects of jewelry making. Their online and in-person courses teach you the basic skills that any jeweler should have, from the basics of artistic composition to working with tools and programs.
Source
Casting silver at home
Hi all! Hamster Time is with you!
Today I want to clearly show how you can make various products from silver without leaving your home. The post will be quite long and interesting, I advise you to read to the end.
So, let's start with the simplest thing.
Before making a copy of anything, you need to stock up on Vaseline; students know that exams are not easy without it) We need it in order to protect the centuries-old patina of the product. Vaseline creates a thin film of fat that prevents the rubber from sticking during vulcanization.
Having chosen the appropriate frame size for the royal cross, mark its internal dimensions on the rubber. Before heat treatment, it is soft and easily cut with scissors. We need two of these pieces. The thickness of one workpiece is 8 mm, and the total thickness is 16 mm.
Even if the halves are cut crookedly, it’s okay! Rubber still expands when heated and fills all cavities. We press down the cross so that it presses tightly and cover it with the second half of the jewelry rubber on top.
When choosing it in a store, you need to pay attention to the vulcanization temperature, in my case it is 90 degrees. If the temperature is above 125 degrees, it will be difficult to choose the right temperature controller.
This vulcanizer was created to order. Unfortunately, all the drawings were lost, but if you really want to, it can be made, the design is not too heavy.
5 W resistors are used as heating elements, and there is also a place on the frame for a temperature sensor.
We connect the device and wait until the vulcanizer heats up to 90 degrees.
It is at this temperature that this rubber changes its molecular properties.
After an hour, the rubber acquires all the necessary properties. The end result is something similar to an eraser.
Next you need to cut it into two parts. We cut in a zigzag manner so that the two halves do not move relative to each other. When a workpiece appears, you need to work very carefully! The cut should be clearly along the edge of the cross. If everything is done correctly, you will end up with two rubber molds that fit perfectly together.
Now the final stage, you need to make channels for air removal.
If they are not there, the wax model will end up covered in bubbles.
Injection wax is easy to melt in a homemade heater, as its melting point is 68 degrees. Produces in a pack of 500 grams.
Jewelry factories use a vacuum injector for this purpose, but we don’t have one and a regular syringe completely copes with this task.
After a minute, when the wax has hardened, the rubber mold can be disassembled. Inside we see a wax copy of our cross. If desired, they can be reproduced at such a speed that rabbits have never even dreamed of)
To create the molding compound we need Kerr Cast 2000 powder and water.
The mixture should be poured on a vibrating table and along the edge of the flask, this will reduce the likelihood of bubbles appearing.
After a few hours, the mixture hardens and can be placed in a steam bath to melt the wax. This action is not necessary, but if calcination is carried out indoors, there will be a lot of smoke and stench.
Now let's move on to the most interesting stage. It is necessary to turn all silver items into a homogeneous mass, this will rid the silver of dirt. Oh, the decorations were beautiful.
Calcination of the flasks takes most of the time and can last for 4-6 hours. The temperature in the muffle furnace rises gradually, starting from 100 degrees for an hour and ending at 720 degrees. The sensor from the tester is used as a temperature sensor, and the regulator itself is assembled on a small microcontroller.
At the next stage, you need to find out the required amount of silver for our cross.
We weigh the wax and multiply the resulting weight by 11. The wax weighs 0.65 grams, multiply by 11 and get 7.15 grams of silver. We throw the required amount of precious metal into the flask and begin to heat it, not forgetting to sprinkle it with borax from time to time.
Then we place everything in a centrifugal machine.
After cooling, we remove the workpiece from the flask and clean it of plaster.
Apart from bubbles on the cross, no other defects were found. Now they need to be removed using mechanical processing, best done with a pointed nozzle coated with diamond. The drill, as always, helps out.
The pectoral cross is polished to a shine, but it is missing something. Let's apply a patina.
This will be done with the help of sulfur ointment; silver reacts with it and darkens.
This way you can highlight the relief of the product.
It is sold in a pharmacy and buying it is not difficult.
A couple of hours after application, the silver radically changes its color. We polish the result with a soft cloth.
Now the relief of the cross has become much brighter and it has become possible to read something on it.
This technology shows that you can quite easily master foundry production at home. On the left is a copy, on the right is the original.
The end result is simply gorgeous!
Well, the video itself. Here you can learn more about the technical aspects.
Possible duplicates found
First I collect it, then I copy it, and then I scatter it across the fields)
Shoot videos, don’t disassemble old ones into pictures. and why are you making copies of coins?
The video is being filmed, but not everything is so fast. I made copies purely for myself!
yeah and instructions on how to assemble a muffle furnace at home