Oh, these decorations! No true woman can indifferently pass by a counter where the creations of jewelers or craftsmen who create unique jewelry are presented. But where can you get the money for such desired acquisitions?
Let's leave the jewelry alone: let them be created by jewelers with tremendous experience, refined taste, and the appropriate material and technical base. But it’s quite possible to aim for something less pretentious.
Silver necklace with spinel from the ITALY SILVER collection in the SUNLIGHT catalog
Any woman who has some free time and money to purchase materials can make beads from natural stones with her own hands. Let's start creating for the benefit of our own beauty?
Elementary beads are easy to create. The most problematic stage is the design of the fastener. Therefore, as a first trial piece of jewelry, you can choose long beads that do not require clasps. And you can wear them in several turns!
How beads are made
Before you start creating a necklace with your own hands, you should understand and learn the essence of the process of extracting and developing a precious resource. A world-renowned specialist in this field, D. Silva deals with complex cases. In the book, he talks about the selection and processing of precious glass.
The mineral is unique, and therefore you can’t just make a hole in it. The processing is quite complex; requires knowledge and the availability of material resources.
For beginners
What stones to make jewelry from for those who just want to get involved in the process without knowing the special intricacies of this craft. Homemade jewelry is always part of any girl’s overall look. The value here is not in the quality and high cost of materials, but in the author’s idea. The most important thing is to initially select the right stone.
Most often, girls decide to play it safe by choosing the most popular and classic options. Amber is very popular. It has both solar cells and some magical characteristics.
Suitable for almost everyone, but it is important to choose the right shape of the pebble. Many Hollywood stars often resort to different shades of amber when inserting it into precious necklaces.
Young people always like crumbs or small round beads. Grown-up ladies are inclined towards brighter and more expressive large stones. They also prefer turquoise. This is such a lucky stone that brings a lot of good not only to the owner, but also to the whole family and friends.
Stylish DIY jewelry can also be made from aventurine. This is a very beautiful stone with elements of glamor. Its material is quite fragile, but it shines simply stunning.
Experts on the topic can argue for hours about which characteristics and species are more meaningful and attractive. The topic is deep and extensive, covering many thousands of lines. Mastery comes with time. There will always be some errors and inaccuracies at first. Try it, read the tutorials with examples, and then start working on creating your own little masterpiece.
First choose the canvas
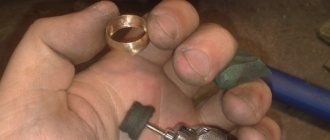
There are several rules here. There should be no chips or cracks, otherwise the future bead will simply crumble during polishing. When a piece is selected, the manipulation zone is marked. The edges may protrude a little, but this is not that important. Silva calls mountain opal the most difficult to work with. It is worth practicing on stronger rocks first.
On a professional grinding machine, the initial cutting is carried out, and the product becomes relatively round. The main assistant in this matter is a rod compass. Next, you need to make a hole in the center of the future thing. This also happens in 4 stages. The workpiece is placed in a brass tray with a constant supply of cold water. Take diamond drills in increasing diameter: 0.75 mm, 1 mm, 1.5 mm, 2 mm. So the diameter is considered the most optimal for stringing valuable stones.
Afterwards, the final stage begins to give the final shape. Final polishing. They use a vice that clamps the mineral, and a grinding machine with several types of attachments. Next, the beads are checked for the presence of defects and the remaining polishing residues are finally removed with a special paste.
D. Silva warns novice jewelers that the correct shape may not be obtained immediately. His early creations did not have perfectly straight sides.
Polishing
Before polishing, the stones are washed to remove abrasive particles, a suitable polishing pad well moistened with water is installed, a polishing compound is applied and polishing of the stone begins from the chamfer. Well-prepared cabochons polish very quickly if some pressure is applied. While working, the stone is wiped with a clean cloth.Small jade pendants.
Sanding and polishing recesses in cabochons
It is done manually using a wooden stick with an abrasive cloth glued to it.
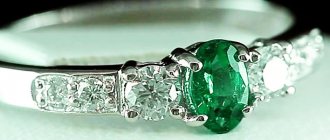
When polishing hard stones (corundum, chrysoberyl, spinel) , as well as when polishing stones prone to crumbling or underpolishing, diamond paste is used.
The best way to process stones is to polish them by hand, especially for those that are too fragile. Some craftsmen process opal , which reduces the likelihood of it heating and cracking.
For hand polishing, the best material is hard leather or thin leather glued to a wooden mandrel. Most materials use tin dioxide or cerium oxide. Marble onyx is quickly polished if you add a couple of drops of vinegar to an aqueous suspension of powder.
Then clean the finished cabochons with alcohol or soapy water using a brush.
How to choose everything you need
How to make beads with your own hands? The first thing you need to do is go to the store to buy everything you need. Craftsmen recommend that before going to purchase accessories, you need to decide on a list in order to buy the things you really need.
You need to choose clothes for which accessories will be designed. It is advisable to draw a future creation. Then we decide on the length and number of layers. Such tricks help to accurately calculate the amount of materials. It is also worth deciding “on the shore” on the color scheme, size, thread material and what kind of iron parts there will be. The harmony of the beads depends on their combination.
Note!
Wood burning for beginners: tips and secrets for burning pictures
Plasticineography - interesting options for creating pictures from plasticine on cardboard for children
- DIY scrapbooking for beginners: what it is and how to do it. What you need to create a beautiful album or notebook (photo + video)
It is better to purchase metal parts imported. If possible, American or Israeli. With cheap beads, ordinary fasteners are used, but when working with valuable minerals, low-quality elements are unacceptable. As for the basics, it depends on who you like.
Beautiful panels made of pebbles
The original panel will favorably emphasize such interior styles as Loft and Provence. To work you will need:
- Pebbles.
- Paints.
- Acrylic lacquer.
- Glue.
- Photo or sketch with the finished image.
The work is carried out based on the selected image. Pebbles are laid using glue on a base (plastic or corrugated cardboard). You can paint individual elements before laying out the working parts or after gluing.
How to use crimps and crimpers
Crimp are small metal tubes that are used to create jewelry. They come in different diameters and shapes. If the thread passes through the crimp once, the diameter should not be very large, however, if it is passed twice, it will be larger, and the thickness of the cable will be smaller.
To form the “plugs”, take a special tool – a crimper. At the initial stage of crimping, the tube is pressed in the far corner of the crimper, after which it looks concave inward; at the second stage, I clamp it with a distant arc. The result is a round piece tightly fixed to the cable.
More about accessories
You can start making jewelry with a simple option that will look very good on every owner. Of course, these are beads - the most popular type of products made from natural stones. They are suitable for women of all ages. The variety of lengths and shapes of beads will help you arrange your costume with this decoration in different ways.
DIY jewelry made from natural stones
Unique accessories are great to highlight your individuality. To create them yourself, you can use many materials. Mountain gems cope with this task perfectly, due to their many qualities:
Note!
How to make a craft with your own hands: what you can do with your own hands at home
- DIY foam crafts: snowman, Christmas tree, sculptures, original figures with instructions (photo + video)
- Papier mache from egg trays, boxes, cassettes: the best ideas on what can be made from egg packaging
- durability,
- availability,
- wear resistance,
- wide range of species and colors.
In addition to beauty and accessibility, such jewelry made from natural stones has a healing effect, which was noticed by our wild ancestors. Even now, if you look at the tribes, almost everyone has a tradition of decorating themselves with natural necklaces created by themselves.
Ancient mythology describes the incredible properties of certain jewelry. Crystals are endowed with mystical properties. There is an opinion that each mineral can strengthen or weaken the owner.
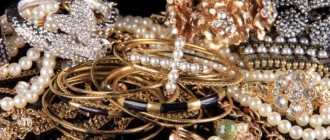
For jewelry, inexpensive and affordable stones are most often purchased, such as agate, turquoise, opal, quartz, and the like. To create a precious necklace with your own hands, order more expensive copies.
How to decide on a bead design
So, having chosen the stones from which the jewelry will be made, you need to move on to the next stage - determining the design. The following classification of beads depending on the size and style of the jewelry will help:
- A short necklace that wraps around the neck is a collar. The length of the jewelry is only 35 cm. To create such jewelry, it is recommended to use small beads - pearls, black agate. You also need to pay enough attention to the fittings and choose a reliable lock for the ribbon and separating rings.
- A choker is considered to be a thread on which medium-sized minerals are strung. The length of the decoration is approximately 40 cm. Products made of coral or garnet will look unusual. If the size of the selected stones allows, you can additionally use caps for beads.
- “Princess” is certainly considered a classic bead option. The model provides one or more rows of weaving. The length of the “princess” reaches 50 cm. Such a design will complement absolutely any image and style, making it individual and unique. Here you can get a little creative and combine several types of stones of various sizes, cuts and colors in a beautiful duet. Using neat connectors and earrings will add some flair to the necklace.
The stones for the future necklace have been selected, the design has also been decided - it’s time to study the features of weaving the jewelry in order to avoid mistakes in this delicate matter.
The most common designs are beads, necklaces, earrings and bracelets.
There are many ways and options to recreate the jewelry of your dreams. To understand how to draw a necklace, you can look on the Internet as a hint or inspiration. The easiest way is to find something close to what you want, and then “adjust” it to suit yourself.
DIY stone jewelry can be a wonderful gift for your loved ones, because it contains a piece of the creator’s soul. To select colors, a horoscope is often used. In most cases, it is precisely those breeds that are favorable for a particular zodiac sign that suit a person most strongly.
Note!
- DIY vase: step-by-step photo instructions, master class for a beautiful and unusual craft
- Paintings from buttons, panels, appliques and compositions with your own hands: how to make flowers, a butterfly, a fish or a tree craft from buttons
Flowers made of wool (85 photos) - how to felt a flower from felt or a wool brooch. Step-by-step instructions for beginners
You can use many types of rope and even ribbon as the basis for a DIY bead necklace. Large details on a bright ribbon look very impressive; you can even tie bows between them.
Use of special fittings
The next master class is devoted to making a carnelian bracelet. Special fittings will be used for its assembly. You will need:
- carnelian beads;
- silicone thread;
- pin with eye – 2 pieces;
- clasp;
- chain;
- decorative metal beads and pendants;
- connecting rings – 4 pieces;
- wire cutters and round nose pliers.
Use a metal pin to mask the ends of the fishing line. To attach this part to a bead, you need to put the bead on and form a loop from the open end using pliers. Carefully bite off the remaining wire tail and crimp it carefully so that it does not injure your hand when worn.
Related article: Stencils for clothing
Prepare another bead using the described method. The string for the set is attached to the eye of the bead.
The size of the decorative metal bead that will be placed next should be such that the eye of the pin is completely hidden inside.
Attach the silicone thread with a double knot to the eye beads. String the required number of beads and decor and align the ends of the lines in the middle of the bracelet. Tie them with a straight knot. Pass the ends of the fishing line to the eye of the pin and duplicate the knots. Cut off excess thread. The knots will be securely hidden under the metal beads.
Now you need to attach the clasp. It will be easily adjustable due to the chain. Attach three links to one of the bracelet's ears, and attach 7-8 links to the second. The structure is attached using connecting rings.
Attach a clasp and add beautiful pendants to the ends of the product.
The stylish carnelian bracelet is ready.
Master class on making beads with your own hands from natural stones
How to make beads from natural stones in the shape of a leather collar and tie from several threads? You need: 3 meters of leather cord, moment glue, 1300-1440 faceted beads of 3-5 mm each, 2 rings of 5 mm each, a lock, a bead needle, crimps and a crimper. All metal parts must match in color.
First we assemble the “collar”. We cut 5 pieces of 480 mm, and the sixth - 540 mm. We bend the long cord at the tip, forming a 150 mm loop, and secure it with thread. For additional strength, fill it with “Moment”. The glue will thicken (3-5 minutes), and then we glue the ends of the remaining five strips here in the form of a ladder, where the middle one is long, 2 and 4 are slightly shorter, and 1 and 5 are very short. We carefully fix everything with thread and, using glue, hide it under the lacing. After a few minutes it had already thickened enough.
We decorate the second edge in the same way. We install rings in the loops, to which we attach a lock.
When one part of the necklace is ready, you can start stringing. The fishing line needs to be 165 cm long. We pass it through the first pebble and populate both ends of the rope. Next, string the beads one by one. Having put on a 70 cm strip in this way, we slightly change the pattern in front of the bead, put on a crimp, clamp it with a crimper, after it another one and pull the needle into the first one. We cut off the rest and tie a couple of knots, otherwise the thread may stretch out.
One is ready. You can collect as many such chains as you wish. You can tie them to the collar with a knot all together or each separately. It is very easy to assemble beads from natural stones, and the result will be incredible.
Handmade
Jewelry with stones is prepared at master classes. Carefully review all the points, then it will be easier for you to start doing everything yourself.
This spectacular accessory can be made in just a few hours. You need to first find or buy turquoise chips, round agate beads, gold beads and crimps. Be sure to find pliers or side cutters.
Let's get down to business, take a jeweler's cable about one meter long. Fold it in half and crimp it, leaving room for a loop everywhere. The crimps are attached with pliers so that it does not dangle on the “cable”. Then the decoration itself is assembled.
The beads are brought to the crimp, then turquoise crumbs are attached to the ends, then agate beads come. All weaving elements are fixed through the first one. The crumbs are again strung on the tails, tightened with beads and fixed with crumbs and an agate bead. All this is repeated over and over again. The fastening element is only created at the ends.
Master class on making a bracelet
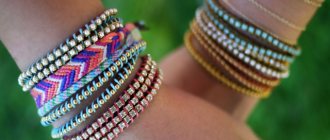
To make a beautiful original hoop for your hand, you don’t need any special skills. Thanks to this, handmade jewelry on the wrists, or better yet several pieces at once, have become popular recently.
To make one chain you will need:
- Spandex
- Beads
- Accessories
It is very interesting to do such things yourself, because you can fully take into account all the wishes - color, shape, degree of transparency, choose the right accessories (rings, separators, all sorts of danglers).
For one simple model, measure 20 cm of gutta-percha thread and tie a large knot so that the beads cannot slip off. Next, we collect stones and accessories in the order in which they should be. Locks are not needed, because the product is stretchable.
To more clearly imagine what the design will be like, it is better to draw an approximate diagram. You can design a structure with an even distribution of beads, or insert one of the brightest details to mark the center.
Once the chain is assembled, try it on your hand and make sure the size is appropriate. We tie the ends, cut off the rest of the thread and hide the knot inside the bead.
Threading method
Threading can be considered the easiest way to make a bracelet. What could be easier than putting pebbles on a string? But even in this simple activity there are a number of nuances. Let's look at an example of creating a bracelet from noble agate. To complete it you will need:
- agate beads with a diameter of 10 mm;
- silicone thread or rubber band;
- nippers, scissors;
- accessories.
Article on the topic: DIY women's hat with knitting needles with photos and videos
Let's take a closer look at the last item on the list. There are various decorative accessories to create jewelry. It will not only help make the decoration convenient, but will also add some zest to it.
For example, huggers. These are metal elements that are sometimes called caps. They cover the bead, creating a beautiful frame.
A bail is a metal connecting element equipped with an eye (or several ears) for pendants.
A rondel is a type of bead that most often has a concave shape.
Pendants are attached to bails and add zest and a finished look to the finished product.
A connector is a part that connects two parts of a bracelet.
To make a bracelet from natural cameos, you need to correctly calculate their quantity. Take your wrist measurement and add some extra size for comfortable wearing. For small beads it will be 0.5-1 cm, and for large ones up to 2.5 cm. Place beads on a prepared silicone thread and tie its ends with a straight knot. Cut off the excess thread, leaving tails 0.5 cm long. Tuck them inside the bead. This is what a regular low top looks like.
In the photo below you can see how decorative fittings can transform a boring bracelet into a fashionable accessory.
And this picture illustrates the correct tying of a straight knot.
Photo ideas for making stone beads
Please repost
1+