Their skill amazes and enchants, they bring dreams to life, create masterpieces, and pass on their skills from generation to generation. These people are jewelers. To conquer metal and turn it into beautiful products requires skill, perseverance and time.
The main metals that specialists work with are gold, silver, and stainless steel. The main operation in the manufacturing technology of a unique product is metal soldering. Soldering technology has its own characteristics for each material. Brazing stainless steel is a complex process.
Soldering silver at home is a rather expensive operation. It is especially technologically difficult and economically expensive to solder two different metals. Special conditions, special solder and flux must be observed. Author's products are becoming popular among consumers. Many complex projects have a combination of silver parts and stainless steel.
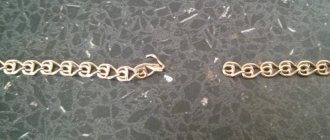
How to solder a chain at home
Repairing a silver chain with your own hands is a filigree and responsible job. It is necessary to have equipment, a set of reagents and, most importantly, skills to work with them. Otherwise, you can damage the product, and instead of restoring it, disfigure it. If the required equipment and reagents are not available and this type of work is new, it is better to abandon the intention of soldering a silver chain at home, and leave this work to a specialist from a jewelry workshop. The same applies to repairing a gold chain.
Basic concepts and definitions
Before you begin repair work on silver or gold, it is important to have a set of necessary materials:
- Solder is a special metal alloy that has a melting point lower than pure metal.
- Flux is a mixture or single substance of an organic or inorganic nature that promotes uniform distribution of solder over the surface and prevents oxidation of the metal when heated.
- An acid solution (not to be confused with acid flux) brightens the metal after soldering.
How to solder a silver chain
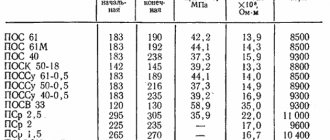
Depending on the standard of the silver jewelry, the brand of solder is selected, which is produced in the form of rods, pieces, etc. An equally important characteristic of the auxiliary alloy is its fluidity and hardness.
Silver solder consists of silver, zinc and copper, and may include tin. The higher the silver content in the alloy, the stronger the soldering will be. The melting point of solder ranges from 640 to 780 °C, while the melting point of pure silver is 961 °C.
Soldering a silver chain at home involves several stages.
- Using any fireproof material (brick, asbestos), securely fasten the parts of the product.
- Treat the joints with flux and put solder between them.
- Carefully heat the metal evenly until a soldering seam is formed (try to solder the silver chain so that the seam is strong and at the same time invisible).
- Cool the product, remove flux and solder, then polish.
- To lighten the soldering area, treat it with an acidic solution, such as nitric acid.
It is possible to solder a silver chain at home with a soldering iron yourself, using special solder combined with flux.
Is it possible to solder a gold chain?
At home, it is possible to solder a gold chain in the same way as described above, using gold solder. It contains gold, silver, copper, zinc and in some alloys cadmium. The melting point of solder varies from 710 to 850 °C, while the same figure for pure gold is 1063 °C.
It is important to understand that repairing a gold chain by a non-specialist, even with the necessary materials, is quite difficult. Therefore, the best way out of the situation is to use the services of jewelry repair specialists.
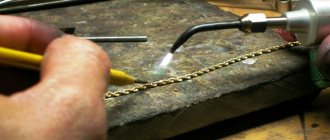
Soldering copper with a gas torch.
Do not pay attention to the fact that the burner in the photo is professional. I prefer to solder copper with just such a gas torch (with a cylinder). We take wire 1 mm thick or thicker. We prepare pieces of copper-phosphorus solder in advance. You will understand what dimensions are needed for the frame after you look at the photos. It all depends on the volume of additional elements that you will attach to the frame. First solder the frame circumference, then solder the jumpers. You can solder several joints at once. We do everything carefully - do not “burn” the wire itself. The solder should spread evenly along the wire, filling the joint.
After annealing, copper becomes soft. To give the copper some rigidity, flatten the entire frame a little with a hammer on an anvil. You can process the frame with a file and polish the copper.
Let's try it on.
I prepared the spirals for this decoration in advance. Watch the video.
Next, we act according to the plan (if there is one, of course).
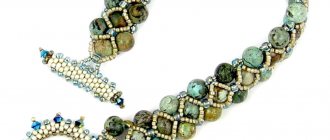
We limited the edges of the cabochon with a spiral. Next, we secure the cabochon with braid so that it does not fall out.
Watch the video with examples of braids.
As a result, we get a pendant like this.
Don't relax - we're not done yet. Let's look at another example. At first, everything was the same as before.
Immediately fasten the cabochon with 1 mm thick wire to the frame. We fix the cabochon in the right place.
An unexpected decision. Yes!?
Well, then we give free rein to our imagination!!!
I used “old” spiral scraps.
Well, I had a blast!!!
Cool, yeah!? I'm not talking about pendants, but about the method of assembly with the frame!
Watch video tutorials on soldering
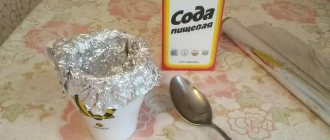
I patinated, polished and then varnished the pendants (copper). To patina (aging) copper, you can use regular ammonia, which is sold in pharmacies. Pour the ammonia into the jar and hang the product ABOVE!!! ammonia solution.
You can also use special universal solutions for blackening.
For polishing, we use a machine grinder (you can use a screwdriver or drill) with attachments. We use polishing pastes.
Copper will darken over time. To avoid this, you can coat the entire product with a special Tsapon varnish.
Products are ready!!! You can wear, give or SELL! Read where and how to sell handmade jewelry on my website Making money with handicrafts!
POPULAR MASTER CLASSES: DIY crystal pendant. DIY wire pendant. DIY wire pendant. Master Class.
Pin the Pin below as a bookmark to your Pinterest board!!!
How do you like the master class!? Did you like it!? Don't be lazy, share with your friends on social media. networks!!! I will be grateful.
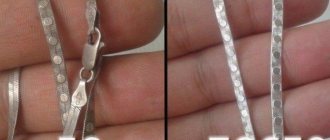
The lock on the chain is broken: how to fix it
There are mainly 3 types of locks used in jewelry:
- carabiner, in which the pin or spring may break;
- springel - practically cannot be repaired, only replaced with a new one;
- box - the tongue or insurance breaks.
It is easy to repair a lock on a chain with your own hands if its individual parts are not broken, but somewhat deformed, for example, in the case of a box lock. You just need to press a little and return them to their previous position. You can repair the carabiner by replacing the pin or spring (if available).
You can make a clasp on a gold or silver chain yourself, just by replacing it with a new one. In other cases, it is better to repair the clasp on the chain in a jewelry workshop. The specialist will select the necessary spare parts and regulate their interaction during installation.
Melting technique using a soldering iron
There are two main methods of soldering with a soldering iron:
- Supplying (draining) solder onto products from the tip of the soldering iron.
- Supplying solder directly to the surface to be treated.
In any case, you should first prepare the parts for soldering, install them and fix them in their original position, heat the tool and moisten the joint with flux. The further procedure is determined by the choice of technology.
When feeding solder from a soldering iron, you should melt a small amount of solder on it (until it is held at the tip) and press the “tip” against the products being connected. The flux will boil and evaporate, and the heated solder will transfer from the soldering iron to the seam. The solder is distributed with the tip along the seam.
The lack of solder will be indicated by the metallic shine of the tip. If there is a noticeable change in the shape of the tip, it can be judged that there is too much solder.
When applying solder directly to the seam, the parts should be heated to soldering temperature, and the solder should be applied to the product or butt joint between the heated tip and the part. During the melting process, solder fills the joints between the products being joined. The choice of technology is determined by the type of work. The first option is suitable for small jobs, the second method is for large items.
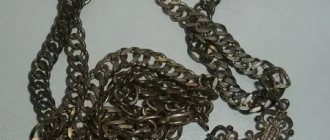
What to do if the chain is stretched
Since silver and gold are soft metals, the weave can stretch out if not handled carefully. First of all, this applies to products made from low-quality alloys or with complex filigree weave. Under severe external influence, a stretched silver chain or gold weave becomes irreversibly deformed.
Heavy gold chains in the Sunlight catalog
If a gold chain of simple weaving has stretched, you can independently remove some of the “extra” links to the previous length. If the weaving is complex and multifaceted, then regardless of the material, it is better to seek the help of a specialist.
Do-it-yourself flux preparation
To carry out the process, borax is required; it is poured into a glass, filled with water and heated through a water bath. The resulting mixture is allowed to cool. A mortar is used to crush the resulting crystals.
When purchasing flux, the optimal solution would be a general purpose option, or for “surfacing” (paste, liquid). Its purpose is to clean the silver coating and transfer heat. It helps remove oxides that impede the joining process. Flux for “surfacing” allows you to join parts at high temperatures, with a chemical change in the surface.