A cabochon is a decorative stone that has no edges. During processing, its surface becomes smooth and convex. Both the insert and the type of cut are designated by the term cabochon. Cabochon is translated from French as “carnation with a head.” But the jewelry name probably comes from the word caboche, meaning head.
A smooth cut is simpler than a faceted cut. People mastered it first. Most ancient peoples have relics in the form of cabochons. But it was the French who took the art of polishing to a new level and coined a term for it that is still used today.
Advantages and features of cabochon cutting
The technology is applicable for all types of stones: precious, semi-precious and ornamental. Transparent gems are more often subject to facet cutting, which enhances the shine of the stone due to multiple reflections of light in the facets.
And the category of cabochons includes minerals that are not capable of producing a strong play of light due to their low refractive index. Transparent gems, such as garnet, ruby or topaz, that have a large defect that prevents light refraction, can also be smoothly polished.
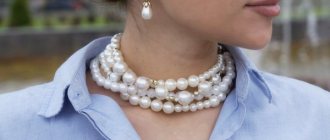
The main share of cabochons is made up of cloudy and opaque stones: agate, amethyst, turquoise, etc.
Do not mistake cabochons made from natural stones as waste from jewelry production. These are bright gems with an unusual patterned structure and a fantasy pattern peeking out from the multi-layered depths. Many of them have beautiful optical effects:
- asterism - when light hits a chip or cut of a crystal, a four-pointed, six-pointed or 12-pointed star begins to be visible;
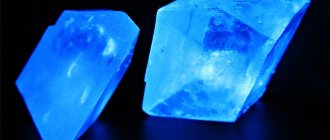
- iridescence - a bright glow with rainbow tints is visible inside the crystal, which appears under intense lighting;
- cat's eye - a vertical highlight of white color. It appears on the surface due to the reflection of light rays. When the insert moves, it seems that the highlight “runs” across the surface from one edge to the other.
The listed effects are most clearly manifested in the “faceless” cut. Therefore, good quality precious raw materials are often processed in this way. Of the noble gems, sapphire, which has a pronounced asterism effect, is most often turned into a cabochon.
A rounded shape is often given to opaque emeralds. Jewelers even came up with a separate name for them - “gardens”
These are green minerals with a carefully polished surface through which the pattern can be seen. The random patterns of “cabochon” emerald truly resemble a garden or forest.
Another noble stone processed as a cabochon is the Burmese ruby. In the absence of edges, the play of its rich red shades is clearly visible, while the faceted cut creates delicate contrasting tints invisible to the human eye.
Sequence of making cabochons
Cabochons are usually made from sawn plates or from individual pieces of sufficient thickness. The larger the stone you need to get, the thicker the plate. For large cabochons, thin plates can also be used. But the extremely gentle curvature of the top of the cabochon, inevitable in this case, creates difficulties when peeling the stone on abrasive wheels and during sanding. An excessively thick plate requires a lot of peeling work. The thickness of the plates is usually 3–6 mm, but for large cabochons it can be up to 9 mm or more.
After sawing, the plates are cleaned of oil, since the oily surface makes it difficult to mark contours and finishing operations. Sharp protrusions formed when sawing and breaking off plates from stone are removed with pliers so that the marking stencil fits tightly onto the plate.
The choice of area for the cabochon on the plate should be determined by both practical and artistic considerations (Fig. 7.6).
Rice. 7.6. Selection of different designs on the agate plate
It is recommended to mark all cracks and ensure that they do not go through the area chosen for the cabochon. To select the best pattern, the marking stencil is moved across the plate until the desired pattern appears. After this, the outline of the cabochon is drawn.
For marking, wire or rods made of bronze or aluminum with a sharpened working end are usually used. Plastic drawing stencils with through holes are used as marking stencils. Since the marked side of the plate will be the bottom surface of the cabochon, the outline must be applied to the side of the plate that is worse. Its best side in this case will be the top part of the finished cabochon.
Next comes pruning . The plate with the applied contours is cut into blanks on a scoring saw. It is necessary to leave an allowance of approximately 3 mm to avoid chipping.
Next, the workpiece is bitten around the perimeter with nippers to reduce the peeling operation. Here you need to combine a lot of pressure with turning the workpiece. Only in this case will pieces of stone break off (Fig. 7.7). Some stones - jade, rhodonite - are very difficult to bite, but agate is easy to bite. Materials that cannot be bitten are peeled off on a wheel to a given contour.
The grinding is carried out on a coarse grinding wheel with low pressure. The outline should be on top. As a result, a rim of 1.5 mm should remain around the contour (Fig. 7.8). The rim serves to compensate for the reduction in cabochon size during marking and further processing.
Rice. 7.8. Shaping the cabochon
On double cabochon blanks that are quite thick, after processing along the contour, the position of the girdle is noted by drawing a line around the edge of the blank at the required distance from the top and bottom. This line serves as a guide when stripping both the bottom and top of the stone.
This is followed by the formation of a chamfer (see Fig. 7.8). All cabochons have a small chamfer ground around the bottom edge of the base. The chamfer prevents the stone from chipping.
| Stone |
| Resin |
| Various diameters depending on the size of the stones |
| Wooden stick |
After removing the first chamfer, the stone is then processed on a mandrel - a special stick 100–105 mm long. Material: hardwood, such as maple and birch. The diameter of the mandrel depends on the shape of the cabochon and ranges from 3 to 18 mm (Fig. 7.9).
| Flat top |
A mixture of sealing wax, shellac, clay powder and beeswax is used as an adhesive resin. When sticking, the stone heats up, so it is necessary to take into account the temperature to avoid destruction of the stone.
| Mark trace |
| The chamfer is too wide |
Next, the top of the cabochon is peeled - stages 2, 3, 4 (see Fig. 7.8). Possible typical errors when performing this operation are shown in Fig. 7.10).
| Lack of symmetry |
| Uneven profile |
Once you have ensured that the contour of the cabochon is preserved and that the chamfer is ground smooth and that the top has a symmetrical curvature without flat areas, the stone can be said to be ready for fine grinding, that is, for sanding.
The basic shape of the stone has already been given. Now the surface is leveled and prepared for sanding , that is, final leveling before fine grinding. When fine sanding, surface texture is important, so when sanding, every deep scratch formed during sanding must be removed.
Before further polishing operations, the stones are removed from the mandrels and thoroughly washed to remove particles of abrasive powder. Polishing begins with a chamfer. Then they move to the top of the cabochon. Well-prepared cabochons are polished within a few seconds. If the stone remains dull or becomes covered with small pits, then the material is prone to underpolishing and you should switch to a harder polishing pad - leather or wood.
The most common mistakes when polishing:
— the use of insufficient pressure, which leads to an increase in the duration of treatment and contributes to the development of the “lemon peel” effect;
— insufficiently thorough inspection of the surface, resulting in unpolished areas;
- using too much polishing powder;
— untimely detection of the appearance of the “lemon peel” effect and a late transition to another polishing pad, which will lead to the need to regrind the stone.
Processing the bottom of the cabochon.
The bottom surfaces of the cabochons can be polished or simply smoothed. If the material is transparent or highly translucent, then the cabochon looks better with a polished bottom. But the bottom should always be completely flat. If the lower part of the cabochon is curved or wavy, then it is difficult to secure it in the frame, and it is possible that it will break or fall out when worn. The edge of the stone that rests on the support belt should have a slight chamfer, allowing you to easily lower the stone into the caste without clinging to its walls. Very often, a cabochon needs to be adjusted due to a mismatch between the setting and the stone. Fitting a cabochon without a chamfer into a tight setting leads to chipping of the stone.
Hollow cabochons are processed in the usual way until the back side is processed. Then they are glued with the reverse side and the recess is smoothed out with a tool with a ball tip mounted in the chuck of a drilling machine. Silicon carbide powder is used for work.
When processing star stones and stones with a cat's eye effect, if the raw material is correctly oriented, no special techniques are required. However, due to their high hardness, sapphire, ruby and chrysoberyl are much more difficult to process. Therefore, using a scoring saw, the deepest possible cuts are made on the stone, not reaching the boundaries of the contour by 1.5 mm. The protruding areas between the cuts are bitten off with nippers or trimmed on a scoring saw. With careful work, you can get a blank that is quite close in shape to the future cabochon.
Self-test questions
1. What shapes of cabochons do you know? What determines their choice?
2. How are stones with optical effects oriented?
3. How are the raw materials for cabochons selected?
4. Sequence of operations in the manufacture of cabochons.
5. How should the bottom of the cabochon be processed?
********************************
What kind of gems are given a rounded shape?
For processing using the cabochon method, a jeweler can choose any crystal that has a pleasant color or fancy pattern. Ideally, both. There are many gems that satisfy these modest requirements:
- jasper;
- agate;
- chrysocolla;
- oligoclase;
- chrysoberyl;
- Tiger's Eye;
- onyx;
- opal;
- nephritis;
- lapis lazuli;
- malachite, etc.
Precious tree resin - amber - also looks more advantageous when smoothed
Round-cut diamonds lose the lion's share of their attractiveness. But in opaque gems it emphasizes and complements the natural beauty. Rounding allows you to visually change the shade or enhance the contrast of color combinations.
Popular free master classes:
Memory wire for necklaces. Master Class.
DIY paracord survival bracelet.
Wire weaving. Pendant made of wire and beads.
Types and shapes of cabochons
Standard technology involves grinding the stone on both sides: the lower part is made flat, and the upper part is made convex. In this form, the insert is easier to inlay into the decoration. Sometimes, to enhance the optical effects, the stone is made completely round.
A cabochon does not have to be round or oval. It can be in the form:
- hearts;
- polygon;
- stars;
- drops;
- shuttle
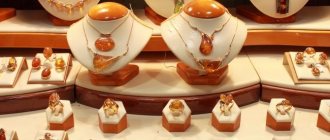
Jewelry cabochons include gems that meet the quality criteria for the type of cut being discussed. Such gems are used for inlaying jewelry. As a rule, no one finds fault with designer jewelry. It is not so important what shape the insert has. The main thing is that it looks beautiful overall.
Weaving beads
This master class will look at a fairly simple method by which you can make beads from seed beads and subsequently turn them into luxurious beads.
Prepare:
- honey-colored beads (use glass material for a spectacular look);
- small caliber gray beads;
- beads: lilac, violet and golden tones.
- We string five honey and gray beads onto a needle and thread, using alternating shades.
We form a ring and make a couple of knots.
We pass through a honey-colored bead, string two lilac ones, one gray one, and again a couple of lilac ones. We pass the thread again into the honey-colored bead and form a petal.
In order to make another, the same detail, we make a similar low from two lilac beads, one gray and two lilac. Next, we thread the thread into the honey-colored material on the main ring.
Read
We make beautiful flower arrangements with our own hands
We get two petal-shaped details on honey beads.
We go to the next one and form the petals in a circle in the same way. In total we make 10 similar parts, two for each bead.
We draw a thread from gray beads in one of the petals, string golden-colored beads and thread a needle with gray beads into the petal next in the circle. Then put the gold beads back into the bead of the adjacent petal and repeat this set. As a result, we get 5 gold tone beads among the five. The thread is drawn from the initial gray thread.
We tighten the thread, forming a ring. We pass the needle through the bead and the bead, and drop two purple-colored pieces into the initial ring. Here you need to go to the second thread and make several knots.
We insert the thread into the gray material in the second ring of petals and do similar manipulations described above. We tighten the braiding and then go through the beads and beads. Then we go down to the bottom and go through a large ring. These steps will help you better perform the tightening process and make several knots.
At the next stage, you can connect the purple beads on both sides. To do this, bring the thread out so that it comes out to the side in the middle of the braided bead, as in the photo:
We string purple material, purple, purple again and draw the thread into two purple pieces in the second ring of petals. Then you need to go through the gold material, turn one hundred and eighty degrees into two beads of a lilac tone, pick up one of the same beads, one violet, lilac, go through two lilac, a gray bead ring, turn into 2 lilac and so on, going around the entire product with a sine wave. We make turns alternately in gold and gray material.
All that remains is to fix the thread, our beaded bead is ready.
How to make a natural cabochon and how to use it?
Collecting river and sea stones is a common hobby that becomes an outlet for many people. What to do with the treasures found? Of course, polish. After proper processing, even river stones become very beautiful. The simplest, but also the most advantageous cutting method for such raw materials is the cabochon. To create a masterpiece, you need to buy several types of sandpaper and abrasive paste.
First, the mineral is ground and given the desired shape. Then polish until the surface becomes perfectly smooth and mirror-like.
Manual grinding takes a lot of time and effort, so if you are interested in it for a long time, it is advisable to acquire a milling cutter or other similar tool.
Ready-made stones can be used to create handmade jewelry. They pair beautifully with many materials, especially beads. Polished gems are used to decorate handbags, backpacks, clothes, and accessories. Frames, blanks and other auxiliary equipment can be found in craft stores. There is another way to use gems - to collect a delightful collection of multi-colored patterned crystals.
You can learn more about what a cabochon is and who invented this cut by watching the video:
Let's look at the process of creating a cabochon from epoxy resin
Let's look at the process of making a cabochon from epoxy resin. To work you need to prepare:
- silicone mold;
- herbarium (rose petals, heather, leaves, etc.);
- transparent epoxy resin.
When choosing molds, pay attention to their surface; if it has roughness, then the cabochon will be matte, which harmonizes perfectly with the winter theme, and if the shape is smooth, then the cabochon will turn out transparent and smooth.
Manufacturing procedure:
- We place the selected herbarium at the bottom of the mold (can be replaced with decorations: beads, beads, etc.). Use a well-dried herbarium, otherwise it may turn black after a while.
- Pour a small amount of resin onto the composition and leave until completely dry, and then top up to the brim. If you fill the entire mold at once, the entire decor will rise to the top.
- We remove the cabochon from the mold and use it further as desired. It can be drilled, ground and polished.
To make a cabochon from polymer clay, you also need to use a mold, which is placed in the oven until the clay hardens, then sand it a little and you can start decorating, if necessary.
The idea of creating a cabochon from a button is original. A master class of this method is presented in the “Video materials” section of this article.
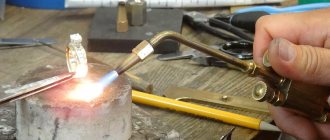
You can’t take your eyes off the lampwork cabochon. To create this product, you must have special equipment (burner, muffle furnace for firing beads, etc.), compliance with safety regulations (working with glasses), so the process takes a long time, it is quite complicated and requires the preparation of a special room. But the results are worth all the effort. Below are photos of the finished cabochons:
One of the most popular ways to decorate stones is to decorate them with beads. To braid a cabochon with beads, it is better to use silk thread rather than fishing line. The size of the beads must be the same in order to secure them evenly on the surface.
To make a cabochon with voluminous decor in the form of beads, several materials are used (felt, cardboard), onto which beads are sewn in stages.