At all times, not excluding modern times, one of the most popular items among jewelry was the chain. Almost every person has it and more than one copy. Jewelry is made in various ways, both manually and on a machine. In this article we will look at how to weave a chain with your own hands and what types are feasible for a novice craftsman.
Diamond shape
The armored type of weaving has polished links located in the same plane. Interlocking loops have a rhombic shape and can be connected with one, two or even three links at a time. There are various combinations of armor weave. For example, small links are woven into large ones or sequentially alternate with each other. The first species is called "Nonna", the second - "Figaro". Another weaving method, which can have a square, oval or round cross-section, is called “Snake” or “Cobra”. Indeed, the cord in appearance resembles a snake’s shell and is slightly curved. Rope chain weaving also belongs to the armored type. When connecting the links, the chain rotates slightly in a certain direction, resembling a rope in appearance.
sea anchor
With the anchor method, the connected links interlock with each other at an angle of 90 0. The loops of a classic chain are oval shaped. This is the simplest weaving method that you can use to make a chain with your own hands. If there is a crossbar between the links, then the weaving is called “Sea Anchor”. There is a coupling of not only narrow, but also wide rings - rollo or chopard. Venetian weaving differs from classical weaving by links that can take the shape of a square or rectangle. One block can contain several elements.
Cord for pendant
Stores sell all kinds of gaitans and chains on which you can hang such decorations. But if you really want to, you can make a cord for the pendant with your own hands.
You can experiment with various ready-made cords, cut them from leather, crochet them or use the macrame technique. The main thing is to decorate the ends beautifully, for which it is better to use ready-made accessories: end caps, rings and carabiners.
All that remains is to put on or tie the pendant on a cord - and you can give jewelry or wear it yourself with legitimate pride in the work done.
11.05.21
Weaving method "link to link"
To make a chain with your own hands using this method, you need to prepare links of the desired shape. The main parameter for any weaving is the correspondence of the diameters of the rings and the wire. The thinner the material and the wider the link, the more unreliable the chain becomes. The opposite option creates difficulties in weaving. The rings are made by wrapping wire around the bolt, so it shouldn't be too small either.
The loops threaded alternately into each other should have the same direction. You can solder the ends of the loops both during weaving and after it. When heated, the melting metal should fill the gap at the bite site. In this way, a possible chain break will be eliminated and the rings will be continuous.
How to make a coin medallion
A variety of coins are almost ready-made medallions. Especially when we are talking about original prototypes, for example, the famous Olympic rubles, ancient coins or money from other countries with a particularly beautiful “eagle”. People consider such pendants not only as original jewelry, but also as talismans that can attract money to the owner’s wallet.
Women have been wearing jewelry made from coins almost since the invention of money. They were called monisto. Now monisto is back in trend, as are simple coin medallions.
Some particularly advanced craftsmen practice making medallions that involve cutting metal (various shapes are cut out in the body of the coin, an eagle is cut out, and so on). This is the most complex option, which we will not consider. We will agree that we will use the coin in almost its original form.
Silver necklace (go to SUNLIGHT catalogue)
So, to make a pendant from a coin, all you need to do is:
- Treat with GOI paste. To do this, it is better to use a special tool with a soft nozzle, but a similar result can be achieved by manual processing.
- Drill a hole. You need to hold the coin in a vice, equip the drill with a thin metal drill (diameter about 1 mm), and drill a hole in the right place.
- Equip the medallion with fittings. An elementary option is a miniature ring. It is better to use a spiral ring (like for keys).
Weaving a double diamond chain
This type of clutch has flat loops shaped like a diamond or an elongated square. Weaving is considered quite durable and popular. The links can be connected one by one, or in groups of two or three pieces together. Women's chains, as a rule, have a flat shape. Men, in turn, prefer massive products with double or triple weave.
The prepared links are stretched, bent and compressed to achieve the required shape. Then weave a chain by inserting the next loop into the previous one. There is a hitch option in which the third link is threaded into the first and passed through the second, then the fourth is threaded into the second and pulled through the third, and so on. After soldering the loops, the finished chain is flattened using rollers. At the end of the work, the hand-woven chain must be polished.
How to bend and join wire
You can make many different objects from wire - from the simplest hook to the most complex designs. Copper, iron, steel, aluminum wire and telephone cable with coatings of different colors are suitable. The wire is stored wound in circles. Tools required: hammer, small vice, file, pliers, wire cutters, pliers, pliers, round nose pliers, plumber's scissors, soldering iron.
The wire is straightened by pulling it between two pieces of wood or by pulling it tightly around a round metal rod (doorknob). It is better to straighten steel wire or thin rod metal on a hard surface with a hammer or mallet. Small parts are bent with pliers or round nose pliers. Large and hard ones are bent in a vice.
Iron and copper thin wire is cut with wire cutters and pliers. Steel - at the site of the cut, it is preheated over a fire. Strip or sheet metal is first marked, and then at the marking points it is lightly scored and chopped with strong blows. Individual pieces of wire and other metal parts are joined by bending or soldering. In the first case, several turns are made, pulling the wire onto the rod. Before soldering, the surface of the parts is thoroughly cleaned with a file or sandpaper to remove dirt and rust. The wire is soldered by putting the two ends together, having first twisted them for strength. Thin wire can be soldered using paste - tinol, which is applied in a thin layer to the soldering site and heated over a fire.
To learn how to make things from wire well and cleanly, you must first make a number of simple parts:
- Spiral spring. A wire 1-1.5 millimeters thick is wound onto a round wooden bolsan of cylindrical or cone shape (Figure 1, a).
- Rings and half rings. The spiral-spring is cut lengthwise (Figure 1, b).
- Flower. Six half rings are soldered to the ring (Figure 1, c).
- Gear. Six half rings are soldered together [Figure 1, d).
- Spiral. Use pliers to grab the end of the wire and twist it in a circle by rotating your hand (Figure 1, e).
- Openwork of three spirals (Figure 1, f).
- Openwork leaf. 4 - 5 rings are made on a cone-shaped blank (wire thickness - 0.5 - 1 millimeter). The resulting rings are given the shape shown in Figure 1g and soldered at the base.
- The trefoil is bent from one wire with pliers (Figure 1, h).
- Wave (Figure 1, i).
Star and ornamental stripe. Mark a pattern on a board of small thickness and drive in nails without heads:
Net:
Flower girl. A bracket with a spiral end is bent from a two-millimeter wire. Separately roll up the ring and fasten it, intercepting the sides. At the top, the spirals are connected by three turns of wire (Figure 4).
Furniture. Made from one and a half to two millimeter wire. Its parts are fastened together with coils. Fine-layer plywood or cardboard can serve as a seat and table top. For fastening, small holes are made in the plywood with an awl (Figure 5).
Puzzle. You should separate its parts so as not to bend the wire anywhere or compress it (Figure 6).
Horse. From two pieces of wire 2.5 - 3 millimeters thick, bend the legs and two lower spirals. From the third piece they make the head, neck and upper spiral. From the fourth - a mane that turns on the back into coils holding pieces of wire together. The mane is soldered in several places (Figure 8).
Heron. It is made from one piece of wire (cross-section - 3 millimeters) with spiral rings for a decorative vase (Figure 9).
I. Lyamin, magazine “Family and School”, 1971
Bismarck chain weaving technology
The main tools for making jewelry are various crossbars, vices, pliers, files and additional materials. At home, knitting needles or any other needles, for example from an umbrella or a bicycle wheel, can be used as crossbars to weave a chain around the neck. A wire is wound around it, forming a spiral. One end needs to be bent in two places, forming a handle, and a cut must be made on the other to secure the wire.
Next, the spiral must be cut into links so that each loop contains two turns. Then the second is screwed into one element using pliers until a characteristic click is heard. In this way, the product is extended to the required length. When weaving a chain, two turns of each link must be compressed to secure it.
Making jewelry
Even the simplest weaving technique allows you to make an unusual product with your own hands. It is possible to make keychains, crowns, models from intricate patterns and figures. Jewelry is usually created from wire-braided beads. It looks original and is suitable for various events. Simple patterns for beginners will allow you to weave your first product. It is recommended to start with something easy. Rings and pendants are quite easy to create.
The work does not take much time, so it can easily be completed in one go.
It is with such products that it is recommended to begin mastering this type of needlework. To create a ring, you should prepare the following materials and tools:
- copper wire;
- large bead;
- pliers and tools with curved edges;
- cylindrical object.
The latter must correspond to the diameter of the finger. It is on this basis that weaving will be made. Now let's see what a step-by-step master class looks like.
- Take a piece of copper cord measuring 15-20 cm.
- Place a bead or other decoration in the middle of the piece.
- Wind the wire onto the cylinder. There should be three turns. It is important that the ends of the wire stick out in different directions.
- Take the tail and pull the copper cord tightly. Make three entwinements around the bead. Each next turn should be lower than the previous one.
- Make turns on each side of the ring. The wire must be pulled as tightly as possible.
- Flatten the tip of the copper material using pliers and press it against the ring. It is important to place the end on the outside. Otherwise, the wire may injure your finger.
- Press the loops as tightly as possible to each other.
The product is created using the Wire Wrap technique. It is easy to learn, so it is suitable for professionals without experience. The following materials and tools should be prepared:
- copper wire with a cross section of 2 mm - 30 cm;
- the same wire, but with a cross-section of 0.7 mm - 60 cm;
- small beads – 12 pcs.;
- pliers;
- hammer;
- ruler;
- round nose pliers.
The work doesn't take much time. You must proceed according to the following instructions.
- Take the thick wire by the end with round pliers.
- Wind the copper into a spiral in increments of 2-3 mm. The last turn should be 5 mm wide.
- Bend the end of the cord into a loop.
- Flatten the spiral. To do this, tap it with a hammer. It is important not to damage the coating on the material.
- Attach a thin wire to the loop.
- Make turns with beads in the center on the last row of the flattened spiral.
- Nibble off the remaining cord and flatten the tip using pliers. Press firmly onto the pendant from the outside.
Weaving chains with your own hands
A product woven using the Viking Knit method is made of soft wire and does not require soldering. When weaving a chain around the neck, the material used is increased.
Before work, you need to prepare a pencil that will serve as a support, thin copper wire, scissors and a ruler. Weaving begins with preparing the base for the chain. Cut about 40 cm of copper thread and wrap it around the ruler, making 6 turns. Remove the resulting loops from the tool and secure them by wrapping them with the short end of the wire. Move the petals in different directions and place them on the blunt side of the pencil, bending them along the support. Start weaving with a new piece of copper thread 80 cm long. Make a loop by threading the wire through one of the warp petals. Then, turning the pencil, insert the upper end of the thread inside the next petal, bringing it out on the left side. In this way, tie loops around the entire base.
The new row begins with the girth of the loop of the previous circle. Then weaving continues in the same way until the working wire runs out. Twist the tip of the new piece of thread with the previous remainder and continue weaving to the required length. Subsequently, this tip will be hidden in the work. Please note that at the end of the work the chain must be stretched. Its length will almost double.
Using the methods discussed above, both men's and women's chains can be woven. By learning to make jewelry, you will gain good experience with metal and learn basic jewelry making skills.
Share on social media networks:
If you want to wear an exclusive and original version of jewelry, then you don’t have to buy it. It is quite possible to create such decorations with your own hands. So, if you set out to make a chain yourself, then you will have to apply some skill and use some skills to create a beautiful and original thing. In this article we will look at how to make a chain of wire with your own hands.
History of wire use
People began using it as a material for creativity and creating necessary household items 3000 BC. Archaeologists have been able to establish that in Sumer (around 2600 BC.
) wire was used to make women's hair ornaments, which were gold and silver ribbons.
Over time, it began to be used to make chain mail, candlesticks, horse brushes and other things.
But where did the craftsmen get the wire suitable for such products? Initially, it was created in a rather labor-intensive way: sheets of metal were cut into thin strips, then twisted together and rolled between two flat sheets.
The second way to obtain it was also to wind thin metal strips onto a round core. Today, it is produced by drawing it through special conical molds, which is why the method of its production is called drawing.
Most often, wire weaving involves the use of copper wire, which has a beautiful appearance and color. In addition, wire made of brass, steel, silver and aluminum is used in needlework. In addition to everything on sale, you can find wire with an additional coating (an alloy of other metals), which allows you to change its color.
Also, an important characteristic of any wire is its diameter. Handmade products use wire with a diameter of 0.2 to 2.0 mm.
Even though today there are a large number of special devices and devices, working with wire can hardly be called simple. After all, in order to create the simplest jewelry, the master needs to have on hand:
- Pliers
- Side cutters
- Round nose pliers
- Anvil
- Device for winding springs
- Hammer
- and Jig-Wig (a plate with rows of holes and special nozzles of various diameters)
Each of the above tools must be used correctly. And this, of course, takes time. Therefore, you should not expect that everything will work out the first time.
However, the presence of such difficulties does not mean that wire is an unpopular material among needlewomen.
On the contrary, it enjoys special attention among handmade craftsmen, because it makes it possible to create complex, exclusive jewelry, the likes of which cannot be found.
Well, now let’s get down to the fun part and tell you what you can create from wire. First of all, these are, of course, earrings, bracelets, rings and all kinds of necklaces and pendants. The variety of weaving techniques, as well as their combination with bright stones and other decorative elements, allows you to create a large number of different women's jewelry.
They all differ in design style, so they can be selected for a wide variety of occasions.
For example, this is what earrings might look like:
Most of them have a complex curled shape. Some are made in the form of small studs, while others, on the contrary, are made in the form of large and massive earrings. Here are some examples:
As already mentioned, chains and pendants are often made from wire. Chains can have completely different shapes and diameters, which completely depends on the chosen weaving technique. In addition, needlewomen often like to complement them with unusually shaped pendants, which together look cute and quite original.
As for pendants, they can either consist entirely of wire or be a cabochon braided with it. The choice of one or another method of creating a pendant or pendant depends entirely on the imagination of the master and the materials at his disposal.
If desired, you can also make complete sets of jewelry from wire. Below is a video tutorial on how this is done in practice. During it, you can see what it takes for a master to create even a seemingly very basic decoration with his own hands:
Wire rings:
However, you should not assume that the wire is no longer good for anything. In the handmade world, everything is possible. That’s why in many homes you can see wicker trees, coasters, candlesticks, bottle holders, decorative figurines and many other wire products.
- Alternatively, it could be these cute butterflies and dragonflies:
- All of them fit perfectly into a modern interior, and can also be selected to decorate a house decorated in any other style.
Viking knit technique
Viking knit is an ancient method of weaving a chain that does not require soldering of the links. In this case, the chain is made from a long piece of gimp, which can always be extended as needed.
Important! This name is translated into Russian as “Viking knots” or “Viking weaving”. This weaving technique got its name because the first piece of jewelry of this type was found in archaeological burials, which belonged to the ancient Vikings. After this discovery there were others that turned out to be even more ancient. However, it is now believed that this weaving technique was originally mastered in the city of Trichipoli, which is located in India.
Such a chain can be made as an antique-style decoration. In this case, to create an antique decoration, you need to prepare the following items:
- thin wire, as a rule, it is best to use copper;
- pencil;
- scissors;
- ruler.
How to make a chain at home using the Viking knit technique:
- First of all, it is necessary to prepare a base on which the very beginning of weaving the chain will be applied. To do this, you need to cut a piece of copper wire about 40 cm long and wrap it around a ruler 5-6 times.
- After this, you need to remove the skein from the ruler, fix the loops, while wrapping the free end of the gimp around them.
- Next, open the fixed loops into a “flower”. This procedure must be carried out very carefully so as not to accidentally crush our loops.
- Then such a “flower” needs to be bent around a pencil.
- Cut another piece of wire with a length of about 65-70 cm, and you can begin the weaving process. To do this, you need to leave a small free end of the wire and make a loop around one of the “petals”.
- Then you need to make a second loop, stepping back one “petal” to the right. We continue in exactly the same way from top to bottom.
- Next you need to make 4 more loops and return again to the first “petal”.
- Now let's move on to the next row. In this case, you need to make the next loop, catching on the first loop of the previous row.
- We continue to knit, each time clinging to the loops of the previous row. We carry out this process until the remaining tip of the wire is about 10-15 cm.
- Now you need to complete the procedure of increasing the gimp so that you can knit further. To do this, you need to cut off another piece and place it under a vertical row of loops.
Important! When, during the knitting process, we reach the area where the wire is built up, we need to grab the new wire along with the loop of the previous row for tight fixation.
- We knit another circle and again approach the area with new wire. Now you need to carry out the correct procedure: to do this, a new piece of wire must be brought up from the left side of the loop, and hooked with the old working wire on the right side of the loop and taken to the bottom direction.
- We knit the old copper thread on several knitting circles together with the loop of the previous row for fixation, after that we cut it off and continue weaving the wire chain with our own hands.
- We continue to knit according to this principle. When, in your opinion, the thread seems to be of sufficient length, the knitted product should be removed from the pencil.
Important! To determine the length of the finished jewelry, you must remember that a knitted product can stretch approximately twice as much.
- And now the most crucial moment: you need to grab the ends with your fingers, stretch the weave and see how it changes.
Making a leather pendant
Now it’s time to turn your attention to DIY leather pendants for beginners. Leather is a very rewarding, effective and environmentally friendly material, but handling it requires some skills. Therefore, we will focus on the simplest option, which requires basic tools, minimal operations with leather and zero purchased accessories.
Even a schoolboy can make this stylish leather pendant with his own hands. As a result of simple manipulations you will receive an original decoration. And its final design will determine whether it will be a unisex pendant or a pendant more befitting a beautiful lady.
We will need:
- a soft leather strap (can be purchased at a craft store);
- thick, rigid wire (to match the diameter of the hole in the beads);
- beads (in the master class we used the main cylindrical beads and one large central one, but you can use others);
- awl, thin-nose pliers, pliers.
We proceed as follows:
We create a sketch of the future decoration, determining the length and configuration of the coils. We fold the lace in several layers and pierce it with an awl.
We use thin-nose pliers to form an eyelet at the end of the wire. We put on the first main bead, then pass the wire through the first hole of the strap. We continue to string the strap and beads alternately, not forgetting about the central one.
We complete the product by bending the wire into a ring. Carefully trim off the excess skin ends. The result is a stylish unisex pendant.
This pendant can be worn either on a chain or on a leather gaitan. Moreover, you can hang it either by both ears, or vertically, by one.
Recommendations on how to make a chain with your own hands
Consider the recommendations below for making antique jewelry with your own hands.
Tip 1
If you purchase an ordinary metal crochet hook and soft wire, then with certain skills and dexterity, you can knit a decent chain of the required length. It is important that the thickness of the hook matches the thickness of the gimp.
The technique for knitting a wire chain is very simple:
- When the first loop is made, the next one needs to be picked up with a hook and pulled through the previous loop.
- Pull the threaded loop to the required length.
- We repeat this procedure of pulling a loop out of a loop so many times until the product is the desired length.
Important! The thickness of the hook must correspond to the thickness of the wire. Otherwise:
- If the hook turns out to be much thicker than the wire used, you will get huge holes.
- If the hook is thinner than the wire used, the knitting process becomes more complicated, since the hook will not be able to properly grip the loops.
Tip 2
How to make a chain with your own hands? If you want to make a chain from brass, steel or copper, then the wire must first be annealed so that the metal becomes soft and pliable. For this:
- Make a template in advance and use a wooden plank with four nails driven into it, with the points facing outward.
- The nails, which are arranged in a diamond shape, determine the shape of the chain links.
- When using the template, you need to bend the S-shaped links in a sequential order, since the tips of the loops should have an elongated shape.
- The links of the chain are connected both directly to each other and using rings, which are made like winding the wire of a pencil, and each turn must be bitten off with wire cutters.
Important! Before connecting the chain links, they should be sanded and filed for safe use, as the burrs can scratch the skin or leave puffs on clothing.
Tip 3
You can also make your own chain from silver wire. The manufacturing technique is exactly the same as when creating jewelry from ordinary wire.
Wire weaving patterns and methods
The first and second pictures show various methods of weaving from two, three or more pieces of wire. Weaving in the form of a braid (Figure 1, I a, b, c, d, e). Take a piece of wire, bend it, and fasten the second wire to the first at the bend. For convenience, the upper part is secured with a nail to the board and woven as shown in the figure. You can make a rope out of two wires. Having connected two pieces, twist them to the right or to the left. Two “ropes” twisted in different directions and placed together form a Christmas tree.
Wicker “path” (Figure 1, II a, b). Taking a wire 1.5 mm thick, bend one end of it, and weave it with thinner wires at the bend until the width required for your path is formed. Having completed the first row, the end of the first piece of wire is bent, passing it between the ends of the entire braid, like the movement of a shuttle in a loom, and weaving of the second row begins. Having finished the second row, the end of the first piece is folded again and passed between the ends of the braid, but from the opposite side. In this order, weave the path to the desired size.
Braided round belt (Figure 1, III a, b, c, d, e, f, g, i, j). The figure shows in sequential order the weaving of a belt from four ends of wire.
When weaving, you need to remember that each row ends by threading the last end into the loop formed by bending the initial one. A new row can be started from any end, but the last one must be threaded into the loop of the first, thus completing the weaving of the row.
The belt is woven from any number of wires. Figure 2 shows the weaving of two belts around the rod (front view and side view). The rod is made up of several wires placed in a row close to each other.
The first end of the wire is threaded behind the rod and forms a loop on the side of the rod, and the second end of this wire, encircling the rod from the front side, is threaded into the resulting loop and wound behind the rod. Then the first end of the wire is encircled around the rod from the front side and threaded into the loop of the second end, and so, doing row after row, you can get a belt of any length.
The second exercise is slightly different from the first; the sequence of its implementation is shown in the figure.
Weaving from individual rings
How to make a chain from wire:
- First you need to cut the prepared wire into several small pieces that are about 5 cm long.
- Then bend the ends and press them firmly with the flat part of the pliers. You should end up with a piece of wire whose round ends are bent.
- Then we take the resulting piece of gimp with pliers at the middle point, bend it in half, while pressing one loop to the other.
Important! The pliers must be exactly in the center, otherwise the two loops will not be able to meet. The result is uneven links and the chain looks ugly.
- After the two loops came together and the flat part of the pliers was pressed, one link was ready.
- After this, you need to thread a piece of wire into the loops of the first link and repeat this procedure.
Important! The number of links determines the length of the finished product. Therefore, it is necessary to calculate the length in advance and thus decide how many links you need for this decoration.
If you want to surprise with a decoration made by yourself, you need to do something truly original. Such a thing could be a chain made from ordinary copper wire. To make such an accessory, you need to try hard: the process requires skill, accuracy and patience. But the result is worth all the effort, because the decoration will be truly unique!
Wire crafts. What do you need to know?
Before you start making your own wire products, it is recommended to study photos of DIY wire crafts on the Internet. This will make sure that such products look quite original and can become an excellent interior decoration.
Wire is a material characterized by a high level of flexibility, as a result of which it practically does not break, which means you can turn even the most complex ideas into reality, giving the craft one shape or another.
From wire you can create crafts not only for the home, but also for the garden. For example, it could be flowers, trees.
Tools and materials
Viking knit or “Viking Knot” is one of the oldest techniques for creating chains. It owes its poetic name to archaeological research in the Scandinavian countries, during which similar jewelry was found.
This weaving does not require soldering at all, which makes the task much easier. In addition, the gimp can be constantly lengthened, creating a product of the desired size.
To create the Viking Knot chain you will need the following:
- A coil of thin copper wire;
- Scissors;
- Pencil;
- Ruler.
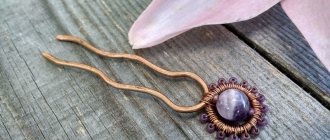
Pendant made of copper wire – master class.
We use a round bead with a hole made of natural stone 10-12 mm. Copper wire 1 mm and 0.4 mm thick. I rarely repeat myself in my jewelry and therefore I don’t know exactly how much wire I will need (God knows what will be born in my head) and therefore I usually take large pieces of thick copper wire for the base, about 50 cm each. The excess can always be cut off later. What if it's not enough?
We weave together 5 pieces of wire in any way.
Next, look at the photo and make it.
A frequent question I hear is why it’s nice and most important to bend braids evenly? To be honest, I do this mostly with my hands. It won’t work out right away - slowly gain experience with practice.
Master class: How to make a wire chain with your own hands.
Making a chain in the Viking style is not difficult, you just need to follow these steps step by step: First, you need to prepare the base on which the first loops of the future decoration will be placed.
This is done like this:
- cut a piece of copper wire about 40 cm in size and wrap it around the ruler 6–7 times.
- Carefully remove the resulting winding and, to secure it, twist it with the free end of the thread.
- After this, you need to move apart, literally open the “flower” of the attached loops. We do this as carefully as possible so as not to bend the wire and spoil the appearance of the product.
- After this, the resulting “flower” needs to go around the edge of the pencil.
- Next, we take another piece of material (about 80 cm) and begin the main process - weaving.
- First of all, we make a loop around one of the so-called “petals”. It is important to remember to leave a small piece of free material.
- For the next loop, we retreat to the right to the adjacent “petal”. To complete this row, you need to knit 4 wire loops and return to the first.
- Then we move on to a new level. To do this, we make another loop, catching on the first from the previous row.
Important! You need to act slowly and carefully so as not to accidentally damage the gimp. Otherwise you'll have to start over.
- In this way we continue to weave a new row. We do this until the free segment is shortened to 12–15 cm.
- To continue knitting, you need to lengthen the gimp. To do this, we take a new piece of material (70–80 cm), which we place under the vertical row. While weaving, you should carefully grab the new wire along with the loop from the previous row for a strong fixation.
- Then, using the new segment, you need to make another loop. At this stage it is important to act as accurately as possible. We bring out the new piece to the left of it, pointing upward, and with the old working wire we cling to the right, leading down.
- We weave the old wire together with the loop of the previous row several times to ensure thorough fixation, then cut off all excess.
- Next, we continue weaving according to the above scheme to the required size - for a bracelet, necklace or something else. When determining the length, it is worth considering that the finished chain is usually stretched twice.
- To complete the work, remove the finished product from the pencil. Carefully take the ends, stretch the resulting weave without sudden movements and look at the result.
Wire extension
To prolong the weaving, it is necessary to increase the material artificially. To do this, a small edge of the previous “thread” is connected and screwed to the new material. The tip of the new wire should be hidden under the other loops and links of the weave. The excess piece is cut off and the creation of new loops and rows of the product continues.
After the number of loops obtained is sufficient, the weave is removed from the pencil and carefully stretched. This way you can already see the entire bracelet. After this, the excess is cut off and fixed. Such weaving will be complemented by a decorative clasp and beads. The master class on how to weave a bracelet yourself is completed. Such weaving from colored wire can become the basis of earrings or a beautiful decorative chain or basket.
Useful tips for making a wire chain
There is another way to make a Viking Knot. It consists of using the most ordinary crochet hook and soft thin wire.
Important! The thickness of the gimp must necessarily correspond to the thickness of the instrument. Otherwise, the process will become significantly more complicated, and you won’t get a beautiful, even weave!
Crocheting a chain is quite easy and does not require special skills. This is done like this: when the first loop is ready, you need to carefully hook the next one and pull it through the previous one. It just sounds complicated, but in fact, a person can figure out the technology even without such experience. Next, carefully pull out the threaded loop to the required length. The process of pulling out the loops is repeated until the decoration reaches the desired size. That's all!
- If desired, the decoration can be made not from copper wire, but from brass, silver or steel.
- But don't choose one that's too thick.
- And in order for the metal used to become soft and pliable, it must be annealed. This can be done over an ordinary gas burner.
- The main thing to remember is safety precautions!
This chain, handmade from wire, is a unique accessory. It can be stylized as antique, creating a themed decoration as if from the Viking era. And if you add original beads and stones, you get something truly unique. This decoration will definitely not go unnoticed!
Methods for bending metal wire
There are several main ways to give metal wire the required shape of the finished product, so we can highlight:
- manual method of bending wire using special tools and simple devices. It is used for wire with a diameter of up to 3 mm in the manufacture of simple products in utility production or households. As a rule, it does not require virtually any financial investment or special knowledge;
- manual method of making jewelry from wire up to 2 mm in diameter. Requires special tools and devices, as well as certain knowledge and skills for working with precious metals;
- bending wire from a coil, which is based on a special device called an unwinder;
- bending wire from a metal rod;
- bending using wire rolling method;
- bending metal wire using the pushing method.
Sources:
- https://art-fashn.ru/prochee/pletenie-iz-provoloki-dlya-nachinayushhih-master-klass-i-shemy-pleteniya.html
- https://vplate.ru/podelki-iz-provoloki/vse-o-pletenii/
- https://vsesamodelki.ru/podelki-iz-provoloki/
- https://hockey-samara.ru/rukodelie/braslet-iz-mednoj-provoloki-svoimi-rukami.html
- https://vplate.ru/podelki-iz-provoloki/kak-sdelat-kreativnyj-braslet/
- https://babudacha.ru/2016/10/10/kak-plesti-iz-provoloki-sxemy-i-idei-podelok/
- https://WikiMetall.ru/metalloobrabotka/gibka-provoloki.html