How to draw a decoration.
Hello, friends! In this lesson you will learn how to draw jewelry step by step with a pencil. As you can imagine, decorations can be very different, and I simply physically cannot touch on all of them in one drawing lesson, so I chose only four decorations that I like the most. So, here we will figure out how a beginner can draw:
- crown
- Ring
- Necklace
- Earrings
We will draw each of these decorations according to the list, and I will break the drawing of each object into simple steps to make it easier and more understandable for you. Well, let's start drawing.
Drawing a crown
Every girl dreams of becoming a queen or at least a princess. But what is a queen without a crown? You can turn any drawn girl into a queen just by adding a crown to her. So how do you do this?
Step 1
In order to draw a decoration such as a crown, we need to work on the base. For the base we need two horizontal lines connected at the sides. From the corners of this structure we draw two lines inclined in different directions, and from the middle the line should be straight. Make sure it looks like the picture below.
Step 2
Now we need to connect the edges of the lines with zigzag lines, like this.
Step 3
Under this line we draw exactly the same one.
Step 4
Now that the crown is almost ready, you need to decorate it. I settled on precious stones. Draw one large gem in the middle, and two small ones on the sides.
Step 5
Erase the extra lines under the stones and connect their edges with the corners of the zigzags.
This is what you should get. You can decorate the crown as you wish - add patterns, embellishments or stones and color it as you wish.
What's in our photo gallery.
Sketches of jewelry Among the sketches you can find:
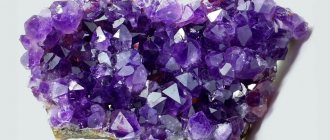
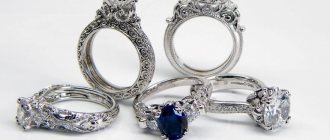
Rings with various inserts, stones: diamond, topaz, ruby, aquamarine, citrine, rauchtopaz, garnet, emerald, pheanite, opal, turquoise, pearl, agate, zircon, quartz and others. Signets, rings made of gold, silver, platinum. Yes, from anything, even from copper. This is a sketch and the products can be made from almost any non-ferrous metal. Earrings and pendants, pendants, icons, crosses, zodiac signs and more. With various stones. Necklace and choker made of white, red, yellow gold. Author's, exclusive options. Bracelets with various inserts, any combination of stones and links. Other: chest decorations, hairpins, orders, brooches and much more.
We thank the Artistic Forging Workshop for the opportunity to post this selection on this website.
Drawing a ring
So, we move on to drawing the next decoration. This time it's a ring.
Step 1
In order to draw a ring step by step, we need to start by drawing its shape. The ring, as you know, is round, so we draw two ovals like this.
Step 2
To make the drawn ring look voluminous, let’s draw a line like this.
Step 3
The ring must be complemented with a precious stone. First we draw its base of the correct shape.
Step 4
And then we connect the corners of the base with straight lines to the ring.
It should look like this.
Decide on a style
The process of creating jewelry begins with visualizing its image. Think about what kind of personalized item you want - ring, earrings, bracelet, brooch - and what it will look like. Next, you need to decide on a style: this will provide the basis for further creativity and the opportunity to see an approximate result.
There are many styles in jewelry, as in design or architecture. For example, Art Nouveau finds its expression in natural and plant motifs, heroes of fairy tales and legends, and Art Deco - in geometric lines, a minimum of decor and large precious inserts. Ethnics are dominated by massiveness, a variety of materials and national ornaments, while vintage is characterized by such elements as cameos, settings and cabochons, stamps depicting plants and flowers.
To decide on the style of jewelry, imagine what exactly you will wear it with. Jewelry in the Art Nouveau, Art Deco and Ethnic styles are bright in themselves, so they go well with clothes of basic shades; Ethnic and vintage looks better with elegant midi dresses and tweed trouser suits, but classics and minimalism can be worn with anything.
Drawing a choker or necklace
This is where there is really real scope for imagination, so it is with drawing a necklace. You can draw just a regular chain with a pendant, or a huge multi-tiered necklace, it's up to you. I'll draw a simple chain with an interesting heart with wings.
Step 1
First, let's draw the shape of the necklace. If you draw this decoration on the neck, consider the angle and position of the body.
Step 2
I start drawing a chain of dots along the edges of the line.
Step 3
Closer to the middle, I draw wide rings that will connect the chain to the main element of the decoration.
Step 4
In the middle, at the very bottom, we begin to draw a heart with two rings at the edges.
Step 5
We connect the heart and the chain with wings.
It should look like this. Now you can paint it, or you can leave it as is.
How a piece of jewelry is created: from sketch to final product
While looking at jewelry in the windows of jewelry stores, have you ever thought about the journey each piece takes before it ends up on sale? Today we are talking about the work of those who create jewelry - we will share the “kitchen” of the process and describe in turn all the stages associated with production: from a sketch on paper to direct implementation.
Moodboard collection and sketch creation
Work on a jewelry collection begins with choosing a current theme and source of inspiration. Before creating sketches, the designer usually draws up a moodboard - a visual representation of the mood of the collection. The mood board usually includes graphic images and photographs necessary to reflect the mood and theme of the future collection. Next is creating a sketch. On paper, the artist's idea takes on real contours. The designer develops several versions of one piece of jewelry at once, which may differ in design elements, inserts, clasp options and other details. Of all the presented versions of the product, one is selected - the best in terms of aesthetics and functionality.
3D modeling and master model
Based on the sketch proposed by the artist, a three-dimensional model of the product is built in a graphic editor (the most common tool in the jewelry environment is Rhinoceros). Thanks to the work of a 3D modeler, the artist’s two-dimensional sketches acquire volume and shape. Such a 3D modeling specialist has the competencies of not only a computer designer, but also a designer and technologist, which means that he takes into account the details and technological features of future products. Sometimes a 3D designer works directly in tandem with a production technologist, which allows a preliminary assessment of all the characteristics of the future product and amendments to the design before the decoration takes its final form. The 3D model must be designed in such a way that it is convenient for jewelry production to work with it. If the 3D model is made technically correctly, in the further production process there will be no difficulties with the product itself. At the same time, an incorrectly executed 3D model may turn out to be completely unsuitable in production conditions, or an order implemented using such a model may increase the cost of the product several times.
The model created in a graphic editor is printed on a 3D printer using a special polymer or wax. This soft-touch model is filled with liquid plaster and placed in the oven. At high temperatures, the plaster hardens, creating a cavity in the shape of the model, and the wax or polymer flows out through the hole left. Next, liquid metal (usually brass) is poured into this cavity, where it cools over time. This is how a master model of the product is obtained. The finished metal product is hand-finished to a standard for all future products. It is important to note that, for example, for each ring size or for each individual element of jewelry, its own master model is created. If, after receiving the master model, significant design flaws are discovered, at this stage the process returns to finalizing the 3D model.
Mold making
The next stage is the creation of a mold, which allows you to speed up and simplify the production process as much as possible, putting it on stream. The raw materials for molds are rubber compounds, so in a professional environment, molds are simply called “rubbers.” The finished master model is enclosed in this plastic mass, then placed in a vulcanization press and heated for 5 minutes, after which it is vulcanized for 40 minutes at high pressure and a temperature of about 140-150°C. At this time, the plasticine-like mass hardens to the state of rubber. After this, the carvers use special tools to carefully cut the mold and remove the master model, which has left a three-dimensional imprint in the rubber. Now the product can be produced in any volume. All products made using this elastic band will look the same. Simple products, without complex components, can be made with a single rubber band, while products with more complex designs usually require the use of several rubber molds (a separate rubber band is created for each part of the product). It is worth noting that rubber bands do not last forever, however, having a master model, you can always make a new mold. Making the mold completes the pre-production stages.
Waxes, “wax trees” and gypsum molding mass
At this stage of production, jewelry takes on a very real, albeit waxy form, which then becomes a kind of stencil for metal casting. The work on making wax models begins with a technical specification, which indicates the number of required products and the size range. Using special equipment (injector), molten wax is injected into the mold. In order for the wax to harden faster, the molds must be cold. Therefore, as the gums heat up, the waxer puts them in the freezer to cool. The finished stencils, along with the outfit, are submitted to the quality department for inspection. The waxes that have passed quality control are attached to the wax rod. The result is a wax tree - a blank for casting in metal, shaped like a Christmas tree. On wax trees, products are grouped by metal: one tree is made of silver, the second is made of gold, etc. Next, this entire wax structure is filled with plaster, after which it is sent to the oven to create a casting mold. At high temperatures, the wax flows out, and its remains burn out, forming a hollow plaster mold inside. This is the mold that will be used for casting. The main task of this stage is to obtain one plaster casting mold with maximum capacity in terms of the number of products.
Casting
Depending on the required metal, a jewelry foundry worker prepares an alloy for pouring by mixing pure metal (in the case of our jewelry, this is silver) with an alloy - a mixture of metals (usually copper, nickel, zinc, but there may be others). The components are melted together, thoroughly mixed to achieve uniformity of content and poured into a plaster mold prepared in advance. The mixture cools, the plaster mold is split, the remaining plaster is washed away with a stream of water and the finished Christmas tree in metal is taken out. Cast wax trees are disassembled into elements, the products are disconnected and sent for processing. The remaining rod with sprues (metal rods to which the products were attached) goes to remelting.
Tumbling and mounting
The next step is tumbling. The essence of this processing method is to polish products by mixing in a special drum with abrasive, where there are ceramic particles in the form of needles, balls, pyramids. After tumbling, the surface of the jewelry becomes smoother and denser.
The majority of products are finished by hand. Mounting, modifying and adjusting parts is a painstaking task that requires care. The strength of the future jewelry depends on the quality of the mounting in jewelry production. After this, the products are manually polished to a shine.
Testing of products
After tumbling and mounting, all jewelry is sent to the assay office. In the Assay Inspectorate, products are analyzed for compliance with the GOST standard. If the declared sample is confirmed, a special hallmark and production name are placed on the products. According to the law, a hallmark must be placed on all products made of precious metals. The only exception is made for silver: if the weight of a silver product is less than three grams, then the sample is set at will.
Electroplating and rhodium plating
Subsequently, those items that are designed with gold plating are plated with a thin layer of gold (we use 750 gold in our silver items) using an electric current and a galvanic bath. Silver products without gilding undergo rhodium plating using the same technology. This happens through an electrochemical reaction, in which particles of the applied metal are deposited on the metal of products immersed in a bath with a special solution.
Rhodium is one of the rarest metals of the platinum group. Due to its high strength, resistance to temperature, as well as to the influence of acids and other aggressive environments, rhodium is used as a protective coating for jewelry made of silver and white gold. In addition, rhodium is hypoallergenic and does not cause irritation or redness. Our silver products undergo a mandatory galvanic rhodium plating process, which protects the metal from natural tarnishing and scratches and imparts a beautiful shine. It is worth noting that galvanic gilding and rhodium plating do not in any way affect the hallmark of the product, which is why this stage follows hallmarking.
Setting stones
The final stage of production is the setting of stones, which are pre-selected for each piece of jewelry. There are two types of fastening - using glue or fastening with the metal itself. Regardless of the type chosen, at this stage the accuracy and precision of the work is especially important: the setter must install the stones in the grooves, attaching them so that they cannot fall out when worn. The organic origin of amber, the softness of the material, as well as the presence of inclusions and air bubbles make the process of working with the stone extremely labor-intensive. A setter working with amber must have exceptional knowledge of the physical properties of the stone in order to avoid chips and cracks.
Creating a complete and self-sufficient jewelry collection is a complex and multi-stage process in which all stages are closely interconnected. 3D modeling is considered especially important - it is this stage that directly determines how simple and fast the immediate implementation of an order in production will be. On average, the preparatory stages of production take about a month, and the direct implementation of the order at the factory takes the same amount.
Among all jewelry, the production of earrings is considered the most expensive. In fact, the retail price must include the cost of producing two products at once, so calculating the market value adequate to the costs is not an easy question. The creation of rings is also considered one of the most difficult, and not only from a production point of view (each size requires a separate master model and, accordingly, separate elastic bands), but also due to the calculation of further sales of products - when ordering, you must take into account the demand for one or another ring size.
It is worth noting that the process described above only applies to the creation of monolithic jewelry (rings, bracelets, pendants, earrings). Decoration elements such as chains, clasps and other types of accessories are purchased separately from jewelry production, as a rule, from other companies that specialize in weaving chains and creating connecting elements for them.
Of course, the production model described above is not the only one, but it is the one that is considered the most suitable on an industrial scale.
Draw earrings
You can draw earrings of any shape, but we will draw long earrings with beads and pendants. If you manage to draw such a decoration, then any others will not be a problem for you.
Step 1
Draw the base - two circles and long lines on top.
Step 2
On top of the line we draw hooks and three beads.
Step 3
Erase the extra lines.
Techniques and Schemes
Now we decide what techniques to use to create the elements of the necklace in order to display the idea. And here, of course, the question arises, where to get these or those techniques, there are many sources, the Internet, (my blog;) magazines, find certain elements and implement them.
But personally, I haven’t done this for a long time; the magazines always contain incorrect or incomplete diagrams with errors, it’s just a waste of time! I’m sure you’ve encountered this.
That's why I made this cheat sheet for myself - it's a set of ready-made diagrams that contain basic techniques and examples of their use. I often use this kit in my work. So back to my example.
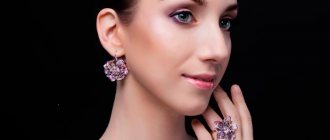
Earrings
First, we need to understand the types of locks on earrings. The most popular are the following: English, French, Italian locks, stud clasp (for studs), staple, loop, pin lock and clasp for hoop earrings.
There are other design solutions on the market.
Earring details in the maximum configuration:
- Earring is a fixed or movable part of an earring. The earring in the French lock is inserted into the ear, and in the English lock it covers the earlobe from the back side to secure it.
- The pin is the part of the jewelry that you insert into your ear. Exception: earrings with a French lock.
- Inlay - Precious, semi-precious stone or other minerals that cover the base.
- Caste is the place where inserts are placed. Same as cast for the ring.
- The base is the surface on which castes and inserts are installed.
- The hanging part is a decorative element of the earring.