Anchor holding force
The anchor holding force is the minimum force that must be applied in the direction of the spindle to tear it off the ground. The holding force of the anchor deviceAnchor devices of towing vessels depends on the type of anchor, the nature of the soil and the length of the etched anchor chain.
The greatest value of the holding force Tau of the anchor device is determined by the formula:
T i = k P i + f P c
Where:
- k is the coefficient of holding force, depending on the type of anchor and the nature of the soil (Table 1);
- Pya – anchor mass, t;
- f – coefficient of friction of the chain on the ground (on average 0.3÷0.6);
- Pts – the weight of the anchor chain lying on the ground is equal to 0.18d2*lts, t;
- lс – length of the anchor chain lying on the ground, m.
| Table 1. Soil characteristics | ||||
| Anchor type | Types of marine soil | |||
| pebbles/sand | rocky soil with a thin layer of silt | liquid sludge | clay | |
| standard without stock (Standard Stockless) | 3,5 | 1,8 | 1,7 | 2,7 |
| increased holding power (High Holding Power – HHP) | 8,0 | 2,4 | 6,0 | 12 |
The coefficients given in the table refer to the action of constant long-term traction force. When the traction force is applied in the form of separate short-term jerks, the holding force may be 2-3 times greater than the calculated one.
Suggested reading: Choosing an anchorage site
The anchor has the greatest holding force when its spindle is in a horizontal position (Fig. 1). Otherwise, the anchor loses some of its holding force. Thus, with a traction force directed to the ground surface at an angle of 15°, the holding force of the anchor is reduced to 50%.
Rice. 1 Anchoring the vessel
Rice. 2 Diagram of forces acting on a ship at anchor
Calculation of anchorage parameters
5/5 — (3 votes)
Anchor holding force
The anchor holding force is the minimum force that must be applied in the direction of the spindle to tear it off the ground. This force is usually referred to as its weight. If it is said that the holding force of an anchor is three, this means that in fact its ability to resist the forces tending to displace the ship will be equal to three times its weight. The holding force of an anchor depends on its type, the nature of the soil and the length of the etched anchor chain. The anchor has the greatest holding force when its spindle is in a horizontal position. Otherwise, the anchor loses some of its holding force. Thus, with a traction force directed to the ground surface at an angle of 15°, the holding force of the anchor is reduced to 50%. In Fig. Figure 2.5 shows the process of picking up soil with an anchor with swivel legs. The greatest value of the holding force Tiau of the anchor device is determined by the formula
Тяу= kPя + fPц
where k is the coefficient of holding force, depending on the type of anchor and the nature of the soil (Table 2.1); Rya— anchor mass, t; f – coefficient of friction of the chain on the ground (on average equal to 0.3); Pt – the weight of the anchor chain lying on the ground is equal to 0.18d2 *l, t; l – length of the anchor chain lying on the ground, m.
The coefficients given in the table refer to the action of constant long-term traction force. When the traction force is applied in the form of separate short-term jerks, the holding force may be 2-3 times greater than the calculated one.
External forces acting on a ship at anchor
Condition for safe anchorage (without drifting at the anchor) - the sum of external influences must be less than the holding force of the anchor device: Rin ≤ Tiau.
We determine the amount of forces from external influences:
The force of wind influence RA depends on the wind speed, the area of the blown surface and is determined by the formula:
where Sx – frontal sail area, m2; W – wind speed, m/s; The force of influence from the current Rm is equal to:
where Sxп is the area of the underwater part of the midsection, m2; Vt – flow speed, m/s.
Inertial forces Rin (forces arising during yaw) are assumed to be equal to the weight of the anchor in the water:
where Mya is the mass of the anchor, kg.
Otherwise the anchor will creep.
Diagram of forces acting on a ship at anchor
The influence of shallow water on anchorage safety
To take into account the forces of wave impacts on the ship’s hull, a dynamic coefficient Kd is introduced, which is taken equal to 1.4÷1.7. So, the holding force of the anchor device must be greater than the sum of all external forces acting on the ship:
Calculation of the required length of the anchor chain
When placing a vessel at one anchor, Calculation of the anchorage consists of solving two problems: calculating the length of the anchor chain required to hold the vessel at anchor and determining the radius of the safe anchorage. The optimal length of the anchor chain required to reliably hold the vessel at one anchor under given hydrometeorological conditions is determined as follows:
For ships equipped with a Hall anchor and chain anchor ropes, the number of bows that must be on the fairlead under favorable weather conditions (wind up to 3–4 points) and a slight current can be approximately determined as the square root of the depth n = √hhl. With a chain length of 250 meters, the holding force of the anchor can be fully used up to a depth of 100 m.
The anchorage radius consists of the following values:
where ΔL is the navigation margin in case of drift and maneuvering when surveying from anchor. The area of the circle limited by radius R is called the anchorage area.
Yaw radius of a ship at anchor
External forces acting on a ship at anchor
Condition for safe anchorage Safe anchorage - the sum of external influences must be less than the holding force of the anchor device: Rin ≤ Tau (Fig. 2). We determine the amount of forces from external influences:
R in n = R A + R t + R i n + R in about n
The force of wind influence RA depends on the wind speed, the area of the blown surface and is determined by the formula:
R A = 0.8 W 2 S x, n;
Where:
- Sх – frontal sail area, m2;
- W – wind speed, m/s;
The force of influence from the current Rm is equal to:
R t = 60 S m V t 2, n;
Where:
- Sxn – area of the underwater part of the midsection, m2;
- Vm – flow velocity, m/s.
Inertial forces Run (forces arising during yaw) are taken equal to the weight of the anchor in the water:
R and n = 8.5 P i, n;
Where:
- Pm – anchor mass, kg
.
To take into account the forces of wave impacts on the ship’s hull, a dynamic coefficient Kb is introduced, which is taken equal to 1.4−1.7.
So, the holding force of the anchor device must be greater than the sum of all external forces acting on the ship, otherwise the anchor will creep, H:
T i y ≥ R in n = K d ( R A + R t + R and n )
When determining the safety of an anchorage, it is necessary to take into account the additional hydrodynamic water pressure created by the current, which depends on the depth under the keel of the vessel (Fig. 3).
Rice. 3 The influence of depth on anchorage safety
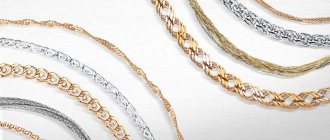
Step-by-step instructions for weaving a Bismarck chain
Bismarck chain weaving
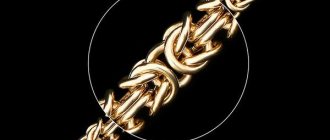
This type of gold chain weaving is the most common and beautiful. Chain weaving "Bismarck"
This type of weaving looks good on both men and women. The chain is easy to make, it is not difficult to adjust it to any weight and length.
Previously, people tried to make chains with such weaving from 100 to 150 grams, but this fashion is long gone and today, the most popular weight is from 20 to 35 grams.
“Bismarck” is the most attractive weave for novice jewelers, because it does not require many years of experience. In addition, this weaving requires a simple set of tools that can be purchased at specialized jewelry stores.
There are several different types of "Bismarck" - flat, "liquid", dense, round and others. All of them are made according to the same principle, they just have different processing. Despite the constant change in fashion, this weaving is always popular.
Required tool kit
You will need a simple set of jewelry tools. It includes a mold, metal shears, rollers, pliers with narrow jaws, a die, a vice, files, and a gasoline burner. The ends of the scissors need to be sharpened a little to make it easier to bite off the links. See picture:
It is advisable to have several scissors in your arsenal to cut different diameters of wire.
You also need crossbars of different diameters; they are used to wind spirals. Crossbars are also sold in specialized jewelry stores and are not expensive, ranging from 500 to 1000 rubles. Of course, you can make them yourself, for example, from a bicycle spoke or a nail. The main thing is that the surface of the crossbar is smooth and even.
Necessary blanks for weaving
First, the metal is poured into the mold, the resulting bar is then passed through the rollers, and the next step is to pull the wire of the required diameter through the die. The thickness of the wire depends on the weight of the future chain. We take a crossbar of the required diameter and make a spiral.
You can wind the spiral by hand, or you can use a drill. For a drill, the crossbar must be smooth, without bending at the end. There are several ways to wind a spiral. I use this method: we clamp two small pieces of wood in a vice and pass a wire between them.
The end of the wire must be slightly flattened and secured into the cut in the crossbar. The spiral should be wound clockwise. If you are left-handed, then wind it counterclockwise.
As a result, we get the following spiral:
Afterwards, you need to spread the spiral, that is, push the rings of the spiral apart until it looks like this:
This is very simple to do: a crossbar of the same diameter as the thickness of our wire is inserted into the middle of the resulting spiral. We scroll the spiral with our fingers and the same distance is formed between the rings.
Then we cut the links, see the picture:
The links should be cut so that the distance between the ends of the link is equal to the thickness of the wire or a little more, but not less, otherwise the links will not click well and you will have to bite off the ends of the link. Now you can start weaving the chain.
Chain assembly
We take the first part of the link in our left hand, and with our right hand we take pliers or round nose pliers and screw the second part of the link into the first. Then we scroll the resulting figure eight in opposite directions until it clicks, this means that the lock is closed and the link is ready. We screw the first part of the second link into the resulting link, and the second part into it, and so on until you reach the desired length.
Of course, you can weave it a little shorter, since then when pulling through the rollers the chain will stretch a little, plus a lock will be added.
The assembled chain looks like a spiral, but after soldering and drawing, the chain becomes absolutely even and flat. When the link is assembled, it must be tightened, see the picture.
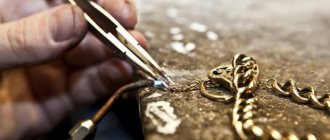
Soldering process
Dip the chain in flux and place it on the soldering board. You can solder links in several ways:
1. Cut the solder into small pieces. We pour it next to the chain on the soldering board. Before taking the solder, we separate one piece and bring the burner flame to it. We heat it until it melts into a ball, then with a titanium shelf we bring it to the place of soldering. We warm up the soldering area well and apply solder. In this way we solder each link on both sides.
2. We also cut the solder into small pieces. Then we take a thin brush, dip it in flux and touch the tip to a separate piece of solder so that it remains on the brush, and carefully move it to the soldering site.
And so we repeat this procedure with each link. Then we wait a little until the flux dries slightly and proceed to soldering. We bring the flame of the burner to the soldering point on which there is a piece of solder and heat it until the solder spreads and solders the link. Once you have soldered one side, carefully turn the chain over and repeat the procedure.
3. This method is the most convenient and fastest, however, it requires a certain skill and dexterity from the jeweler, which comes with experience. The method is called wire soldering. We take solder, roll it in a roller, then pass it through a die to get a wire with a diameter of 0.45 mm. Then we heat the joint with a thin burner flame. We bring the solder to the heated place, touch the tip and cut off the required amount of solder with a flame and thus move on to the next link.
https://www.youtube.com/watch?v=dh3ofBjtJco
Bleaching of soldered chain
After soldering, bleach the chain in any bleach suitable for the given alloy. You can use regular citric acid dissolved in hot water. If after bleaching there is a slight white coating left, then you need to pour baking soda into one hand and add a little water to it so that you get a paste. We place the chain in this mixture. Cover with your second hand and use circular movements for three minutes, 5-7, then rinse the chain in an ultrasonic bath.
Aligning the chain
At this stage it is necessary to stretch the chain in the rollers. To do this, you need to insert a wire into each end of the chain. It should be of such length that you can grasp it well. We move the roller shafts apart, pass the chain with the wire and slowly press the shafts until the upper shaft slightly presses the chain to the lower one.
Then we grab the wire with our hands and pull it, now in one direction, then in the other. The chain straightens out and becomes a little flat. It is very important not to overtighten the chain. After pulling with one hand, we take hold of the end of the chain and look at where there are bends, then carefully align it with our hands.
Chain processing and grinding
Chain processing begins with sawing. You can nail the chain in different ways. Some perform this procedure only on the plane, only on the sides, stronger or weaker. Sawing affects the final appearance of the product; it is done by weight.
To do this, it is necessary to clamp a steel wire hook in a vice, on which one end of the chain is hung, the other end of the chain is tensioned and sawing is carried out with a file. Under the tensioned chain, it is necessary to place a container into which the gold particles will fall, to make it more convenient to collect them.
After filing with a file, the chain must be sanded with fine sandpaper to remove deep scratches. After processing is completed, we adjust the required length of the chain. Then we make the ears for the lock and install the clasp.
Now the chain is ready to be polished on a polishing wheel using the Goya paste. After polishing, you need to wash the chain in an ultrasonic bath and dry it with a hairdryer. That's it, the chain is ready! Other types of weaving chains and bracelets can be viewed here.
Calculation of the length of the anchor chain when setting on one anchor
Calculating a safe anchorage involves solving two problems:
- Determining the length of the anchor chain required to hold the vessel at anchor;
- Determining the radius of a safe anchorage.
The optimal length of the anchor chain required to reliably hold the vessel at one anchor under given hydrometeorological conditions is determined as follows:
L i c = 0.17 (R in n / q * (67.5 h k l + R in n / q) – R in n / q), m;
Where:
- q – linear density of 1 m of chain in water, kN/m;
q = 0.00018 d q 2
- dts – anchor chain caliber, mm;
- hcl – hawse height above the ground, m.
The anchorage radius is the sum of the following quantities:
R = L i c + L c + Δ L,
Where:
- Lyats – length of the given anchor chain, m;
- Lс – maximum length of the vessel, m;
- ΔL – navigation margin in case of drift or maneuvering when surveying from anchor, m.
The area of the circle limited by radius R is called the anchorage area.