Bismarck chain manufacturing technology
In this blog I will tell you, using a simple example, how to make the most common type of Bismarck chain at home, with minimal tools.
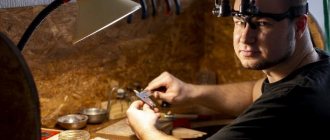
Necessary tool
Blanks
A wire of the required diameter is taken, depending on the weight required to make the chain. A crossbar of the required diameter is taken and a spiral is wound. You can wind the spiral manually, or you can use a drill.
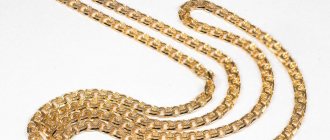
As a result, when you remove the wire from the crossbar, you should end up with a spiral like this
This is done like this: a bolt of the required diameter is inserted into the middle of the spiral and the spiral is scrolled with your fingers, as if moving apart.
The crossbar needs to be selected such that the distance between the spiral rings is not very small, not very large, and is approximately equal to the thickness of the wire from which the chain is made or a little more. Then we cut the links (for more details on how to cut the links, you can enter “making a Bismarck chain” in any video).
The links should be cut so that the distance between the ends of the link is equal to the thickness of the wire or a little more. That's it, you can start assembling.
Assembly
Take the first part of the link in one hand, with the other hand, using pliers or tweezers (whichever is more convenient for you, I personally use pliers), take the second part of the link and screw it into the first. The next part of the second link is screwed into the resulting link, the mating part into it, etc. until the chain of the required length is obtained. Maybe a little shorter, because... then when pulling the chain stretches a little. The assembled chain has the shape of a spiral. But after soldering and pulling, the chain becomes straight. When the link is assembled, it needs to be tightened.
Soldering
You can solder in several ways:
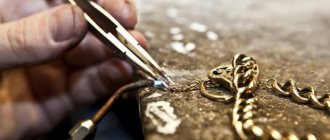
1.Cut the solder into small pieces, pour it onto the lethal, bring a thin flame of the burner to a separate piece and when it melts into a ball, “take” it with a soldering needle. Heat the link to the melting temperature of the solder and move the ball of solder from the needle to the desired location on the link until it spreads. When one side is soldered, carefully turn the chain over to the other side and solder the second side in the same way.
2.Cut the solder into small pieces and pour, for example, into some kind of lid. Take the thinnest squirrel brush. Dip it in flux. With the tip of the brush, touch a separate piece of solder so that it remains on the tip of the brush and, with a gentle stroke, move it onto the link so that the solder lies in the soldering area. Then to the next link and so on for the entire chain. Wait a little while the flux dries and solder the chain one by one, bringing a thin flame of the burner to each link and pointing it at the solder until it spreads. When one side is soldered, carefully turn the chain over to the other side and solder the second side in the same way.
Whitening
The chain is bleached after soldering in any bleach suitable for the alloy from which the chain is made. Personally, I use regular food grade citric acid dissolved in water. Its vapors are not as harmful to health as those of sulfuric or hydrochloric acid. Splashes do not corrode clothing and do not cause burns if they come into contact with the skin. Yes, and it whitens well. You just need to boil the chain in acid. If there is a small residue left, then you need to make a thick paste of soda and water and thoroughly rub the chain in it.
Alignment
After soldering and bleaching, the chain must be stretched (not rolled!) in a roller. To do this, insert a wire into one end of the chain so that you can grab it with pliers, and stretch it to the desired thickness, gradually pressing the rollers. If you need to get a flat chain, press the rollers more; if they are larger, then less. The main thing is not to overdo it! After pulling, you need to align the chain with your hands (if the chain is thick, then in a vice) so that there is no “spiral” effect.
Sawing
Final operations
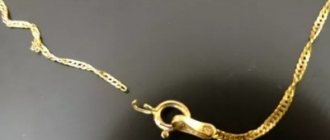
We adjust the desired length of the chain by cutting off the extra links from the ends. We solder tips from plates or just rings of wire and a lock onto the ends. That's it, the chain is ready for polishing! I won’t describe how to polish. Everyone polishes in a way that suits them.
If you are interested, in more detail, as I already wrote, you can look on the Internet. Just be careful, it's very addictive. ))))
Source
Advantages and disadvantages of weaving
If we talk about the positive features of jewelry of this type, it is necessary to note the following:
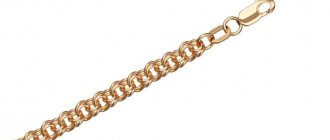
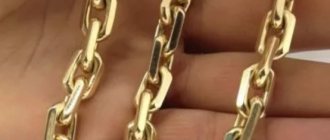
- Appearance. A silver or gold Bismarck weave chain is quite massive, so it looks very expensive.
- Reliability. During the production of high-quality products, the links are woven and soldered, making the jewelry durable.
- A wide range of. For production, circles, ovals, rectangles made of flat or cylindrical wire are used. In addition, there are many weaving techniques, as well as the possibility of inlaying the finished product with precious stones and pearls.
- Good hold. Massive ligature requires a strong lock. In the production of such chains, high-strength carbines and springels are used.
- Duration of operation. Provided that high-quality materials are used and technology is followed, the finished product will last up to 50 years.
- Can be used with other accessories. Pendants, Orthodox and Catholic crosses, and medallions are hung on the decoration itself. It can also be combined with massive rings in your look.
- It is important to note that Bismarck gold and silver chains are made from high-grade precious metals, so they do not oxidize, do not leave green marks, etc.
Now it would be fair to note the disadvantages of such accessories. Firstly, weaving is not used in the manufacture of budget products. If the purchase amount is limited, it is better to look for other models. In addition, massive jewelry can overload the image, especially for young girls and boys.
View all “Double Bismarck” weaving chains in the SUNLIGHT catalog
Step-by-step instructions for weaving a Bismarck chain
Bismarck chain weaving
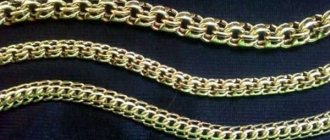
This type of gold chain weaving is the most common and beautiful. Chain weaving "Bismarck"
This type of weaving looks good on both men and women. The chain is easy to make, it is not difficult to adjust it to any weight and length.
Previously, people tried to make chains with such weaving from 100 to 150 grams, but this fashion is long gone and today, the most popular weight is from 20 to 35 grams.
“Bismarck” is the most attractive weave for novice jewelers, because it does not require many years of experience. In addition, this weaving requires a simple set of tools that can be purchased at specialized jewelry stores.
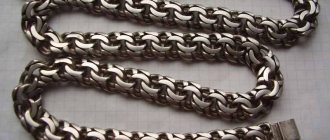
There are several different types of "Bismarck" - flat, "liquid", dense, round and others. All of them are made according to the same principle, they just have different processing. Despite the constant change in fashion, this weaving is always popular.
Required tool kit
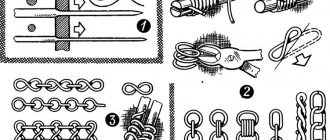
You will need a simple set of jewelry tools. It includes a mold, metal shears, rollers, pliers with narrow jaws, a die, a vice, files, and a gasoline burner. The ends of the scissors need to be sharpened a little to make it easier to bite off the links. See picture:
It is advisable to have several scissors in your arsenal to cut different diameters of wire.
You also need crossbars of different diameters; they are used to wind spirals. Crossbars are also sold in specialized jewelry stores and are not expensive, ranging from 500 to 1000 rubles. Of course, you can make them yourself, for example, from a bicycle spoke or a nail. The main thing is that the surface of the crossbar is smooth and even.
Necessary blanks for weaving
First, the metal is poured into the mold, the resulting bar is then passed through the rollers, and the next step is to pull the wire of the required diameter through the die. The thickness of the wire depends on the weight of the future chain. We take a crossbar of the required diameter and make a spiral.
You can wind the spiral by hand, or you can use a drill. For a drill, the crossbar must be smooth, without bending at the end. There are several ways to wind a spiral. I use this method: we clamp two small pieces of wood in a vice and pass a wire between them.
The end of the wire must be slightly flattened and secured into the cut in the crossbar. The spiral should be wound clockwise. If you are left-handed, then wind it counterclockwise.
As a result, we get the following spiral:
Afterwards, you need to spread the spiral, that is, push the rings of the spiral apart until it looks like this:
This is very simple to do: a crossbar of the same diameter as the thickness of our wire is inserted into the middle of the resulting spiral. We scroll the spiral with our fingers and the same distance is formed between the rings.
Then we cut the links, see the picture:
The links should be cut so that the distance between the ends of the link is equal to the thickness of the wire or a little more, but not less, otherwise the links will not click well and you will have to bite off the ends of the link. Now you can start weaving the chain.
Chain assembly
We take the first part of the link in our left hand, and with our right hand we take pliers or round nose pliers and screw the second part of the link into the first. Then we scroll the resulting figure eight in opposite directions until it clicks, this means that the lock is closed and the link is ready. We screw the first part of the second link into the resulting link, and the second part into it, and so on until you reach the desired length.
Of course, you can weave it a little shorter, since then when pulling through the rollers the chain will stretch a little, plus a lock will be added.
The assembled chain looks like a spiral, but after soldering and drawing, the chain becomes absolutely even and flat. When the link is assembled, it must be tightened, see the picture.
Subspecies of weaving
More than 15 varieties of chains are known, which differ in weaving technique.
- Classic version (flat).
- Double.
- Triple.
- "Royal".
- "Arab".
- "Python" ("Cardinal").
- Oval.
- Semi-volume and others.
The Cardinal weave has many other names - “American”, “Pharaoh”, “Python”, “Kaiser” and so on. It takes a little gold to make the accessory (from 5 grams), but it looks solid. Chains of this type are popular. Jewelry can be worn without removing.
Bismarck Chain – Step-by-step course
Manufacturing technology of the Bismarck chain from “A” to “Z”
We present to you the most complete and detailed description of the technology for making Bismarck weaving . Until recently, this material was only available on the site and was sold for $30. Now we have decided to post the technology for making the Bismarck chain absolutely free! Now everyone who is interested in how to weave a Bismarck chain will find for themselves the most complete and comprehensive information on this issue! In addition to a detailed description of the technology for making Bismarck chains, on our website you will learn how to calculate the required weight and length for Bismarck chains and bracelets, and the calculation formula. Description and formulas of solders for soldering Bismarck chains and other types of chains. Varieties of “Bismarcks” and features of their manufacture (“Triple Bismarck”, “Arab Bismarck”, “Moscow Bismarck”). Secrets and tricks that facilitate and speed up the process of making chains. Where to buy jewelry tools? How and where to buy jewelry tools 3-4 times cheaper than in a regular store? You will find answers to all these questions on our website. Almost all instructions for making chains are accompanied by videos that show close-up how this or that operation is done. We also have our own video channel on YouTube, where you can watch videos related to the topic of making chains. For the convenience of calculating chains and bracelets, we have prepared files with Microsoft Excel tables for automatic calculations based on specified parameters. All these materials are now available in the sections of our website dedicated to making chains.